
Building a Home Lab for Vulnerability Management with Nessus Essentials
Project information
- Title: Vulnerability Management Home Lab
- Organizer: Self
- Project date: August, 2023
- URL: ajithchandranr.github.io
Description
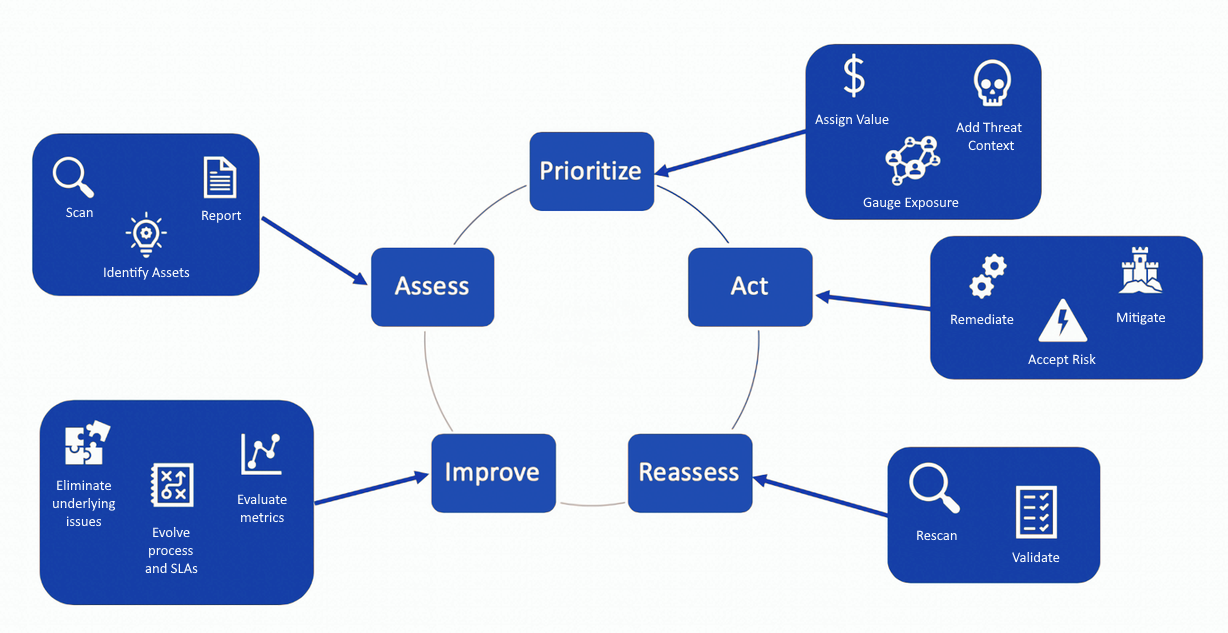
Vulnerability management is a continuous and systematic practice that involves identifying, evaluating, reporting, and addressing cybersecurity vulnerabilities present in endpoints, workloads, and systems.
The main focus of this project was to acquire practical skills in using Nessus Essentials and to become proficient in vulnerability scanning and applying remediation techniques. Throughout the project, I emphasized two critical stages of the "Vulnerability Management Lifecycle". To accomplish this, I employed Nessus Essentials to conduct vulnerability scans on local VMs hosted on "VMWare Workstation Pro". The process included running credentialed scans to identify vulnerabilities, taking necessary actions to resolve some of the discovered issues, and conducting a follow-up rescan to validate the successful remediation efforts.
. . .
Helpful Links:
-
VMWare Workstation Pro: https://www.vmware.com/products/workstation-player/workstation-player-evaluation.html
-
Windows 10: https://www.microsoft.com/en-us/software-download/windows10
-
Nessus Essentials: https://www.tenable.com/products/nessus/nessus-essentials
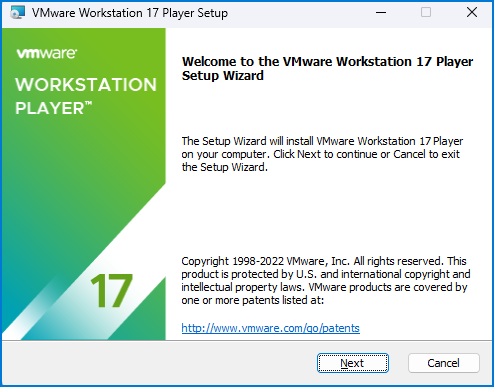
I am going to start by setting up the virtual machine (VM). To do this, I downloaded and installed VMWare Workstation Pro.
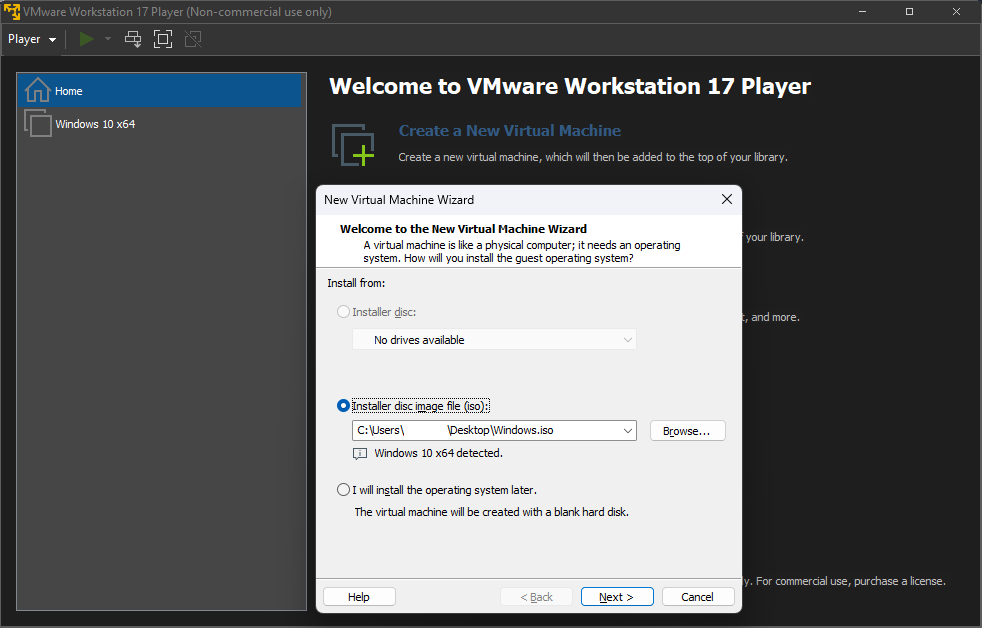
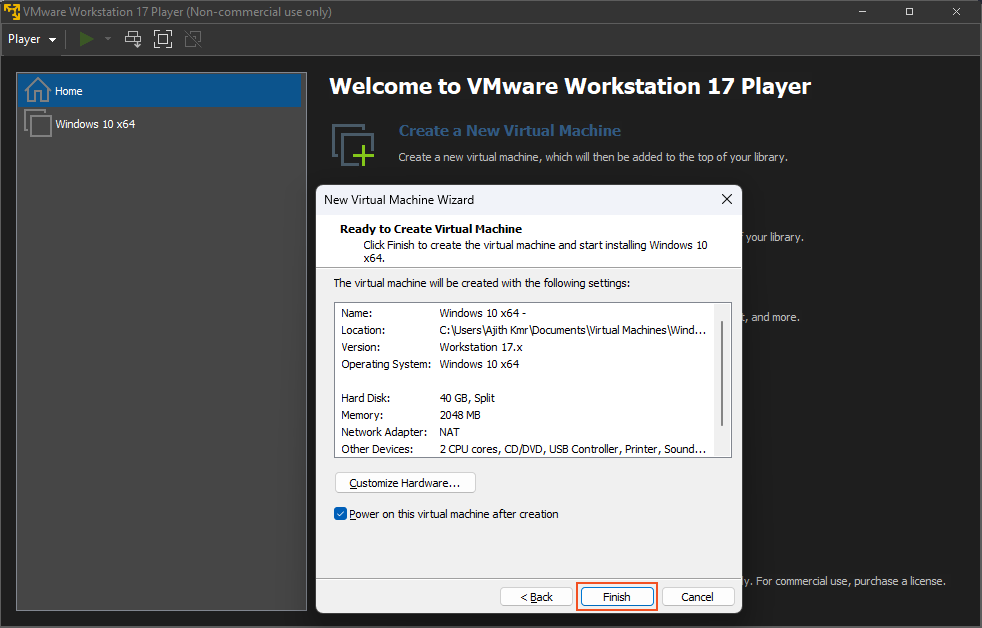
Upon launching VMWare Workstation Pro, I proceeded by selecting "Create a New Virtual Machine" and then chose the previously downloaded Windows ISO file. I configured the remaining settings according to my preferences and concluded the setup by clicking on "Finish."

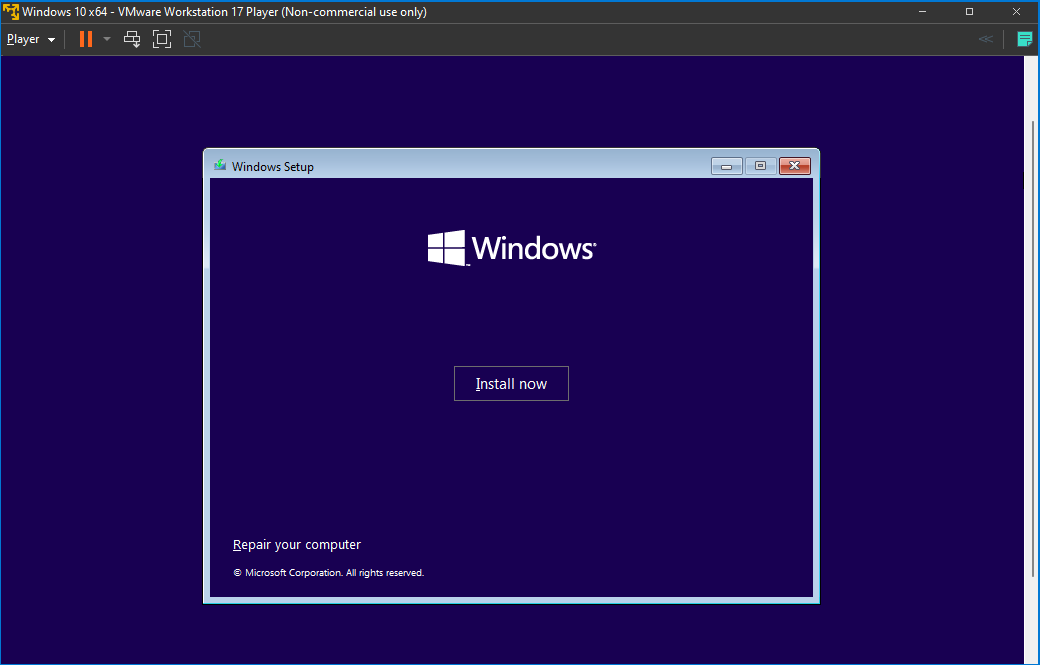
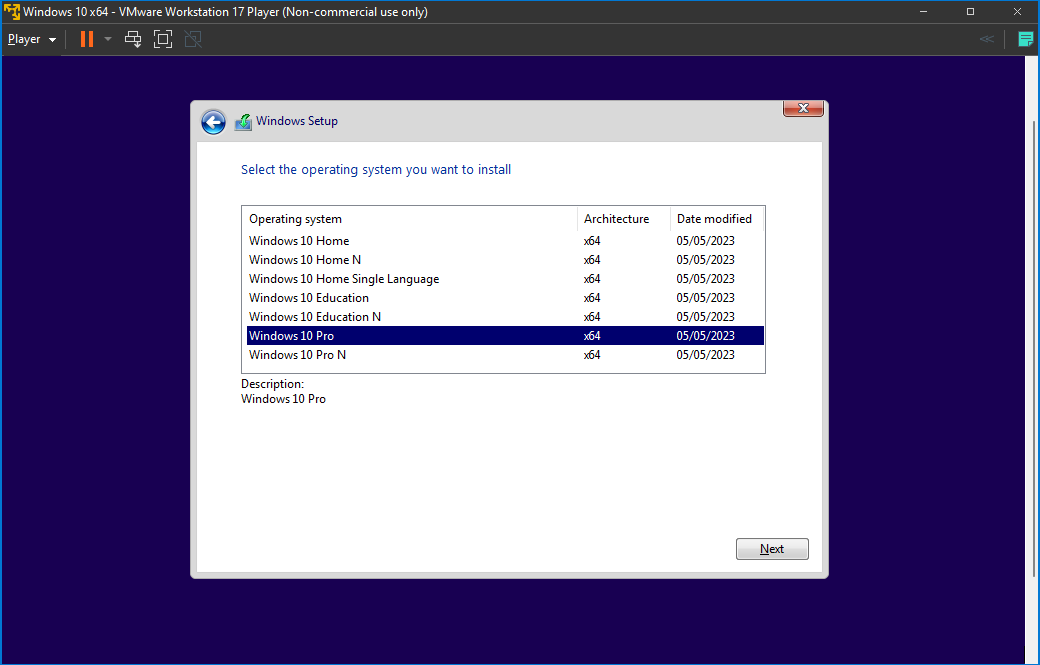
Subsequently, I successfully concluded the installation of Windows 10 on the virtual machine (VM).
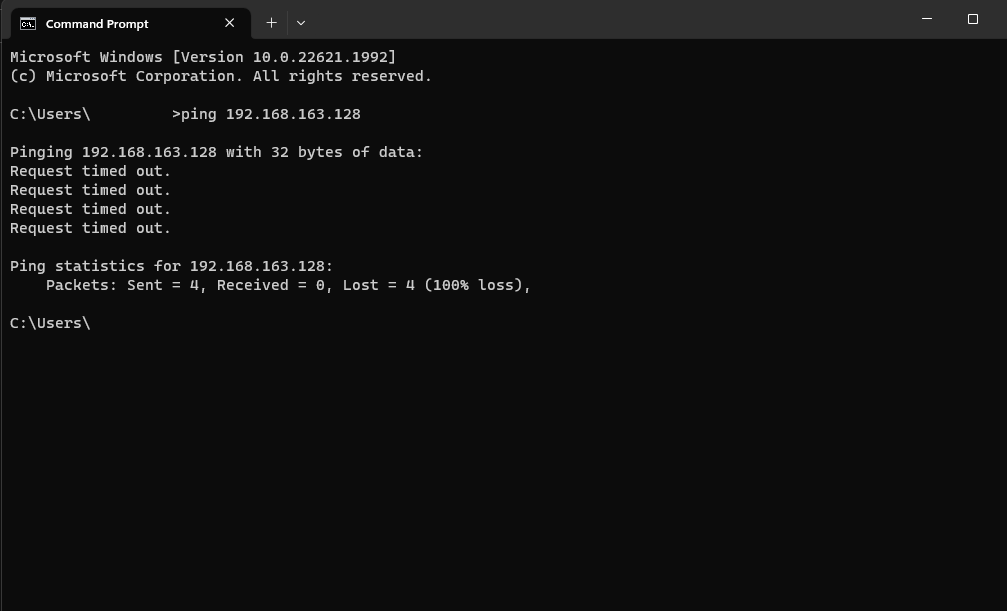
I decided to ping the VM from my native computer to check if there was proper communication with it. The reason behind this was to ensure that if I couldn't ping the VM, it would also affect Nessus' ability to run its scans. Regrettably, the pings timed out, indicating that there was no current connection established between my native PC and the VM.
The lack of connection on my PC is attributed to the active firewall on the VM, which is currently blocking all connection attempts.
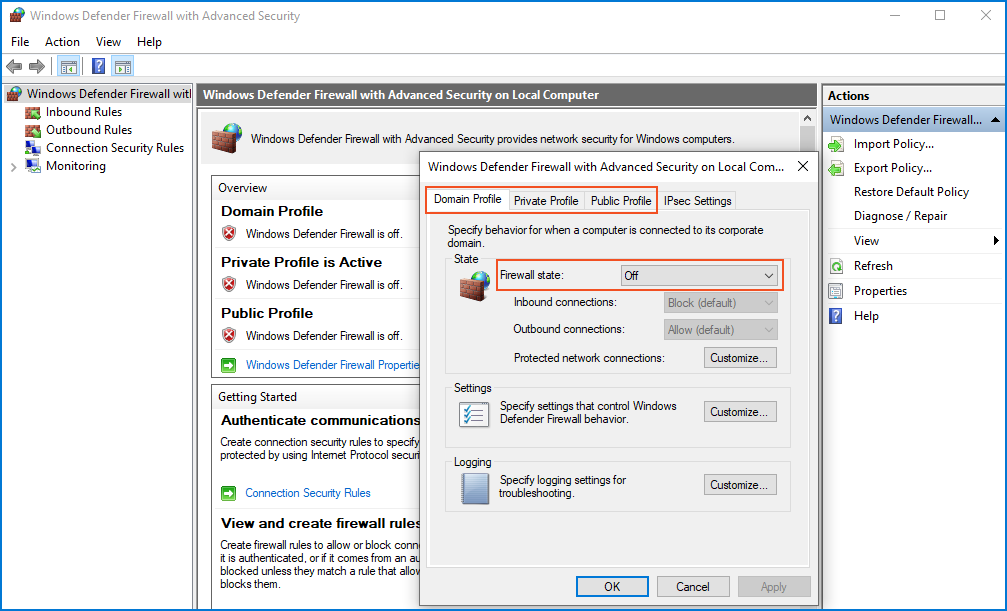
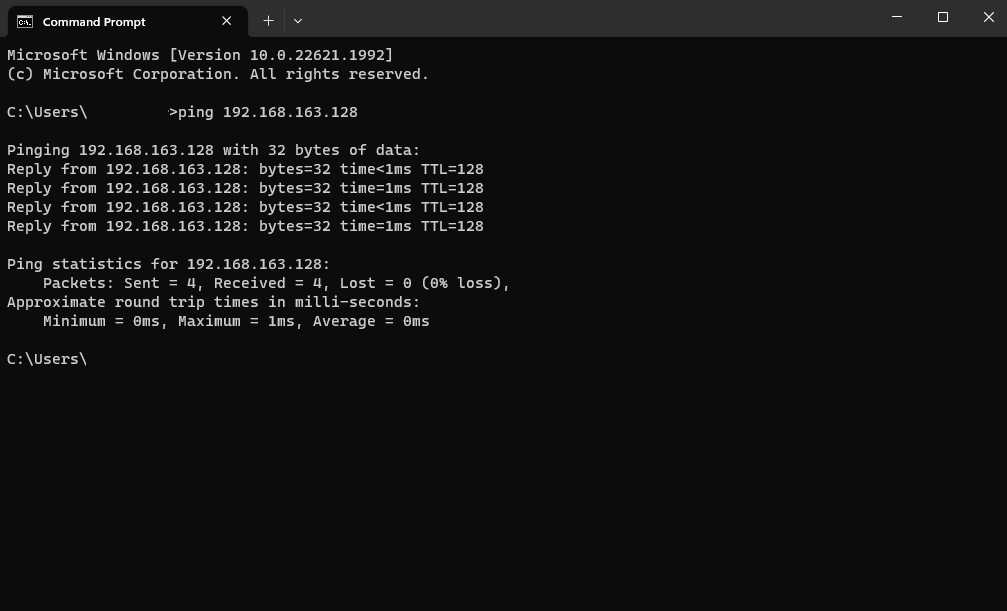
To continue with the lab, I disabled the firewalls by opening "Windows Firewall with Advanced Security" and clicking on "Windows Defender Firewall Properties." Then, I turned "off" the "Firewall State" for Domain, Private, and Public profiles. After making these changes, I retried the ping, and this time it was successful.
Since the VM was set up, I proceeded to install Nessus. After signing up earlier, I received a download link and activation code for Nessus Essentials. I downloaded the installation file and then initiated the setup. It took approximately an hour to complete the installation and compilation of the plugins.
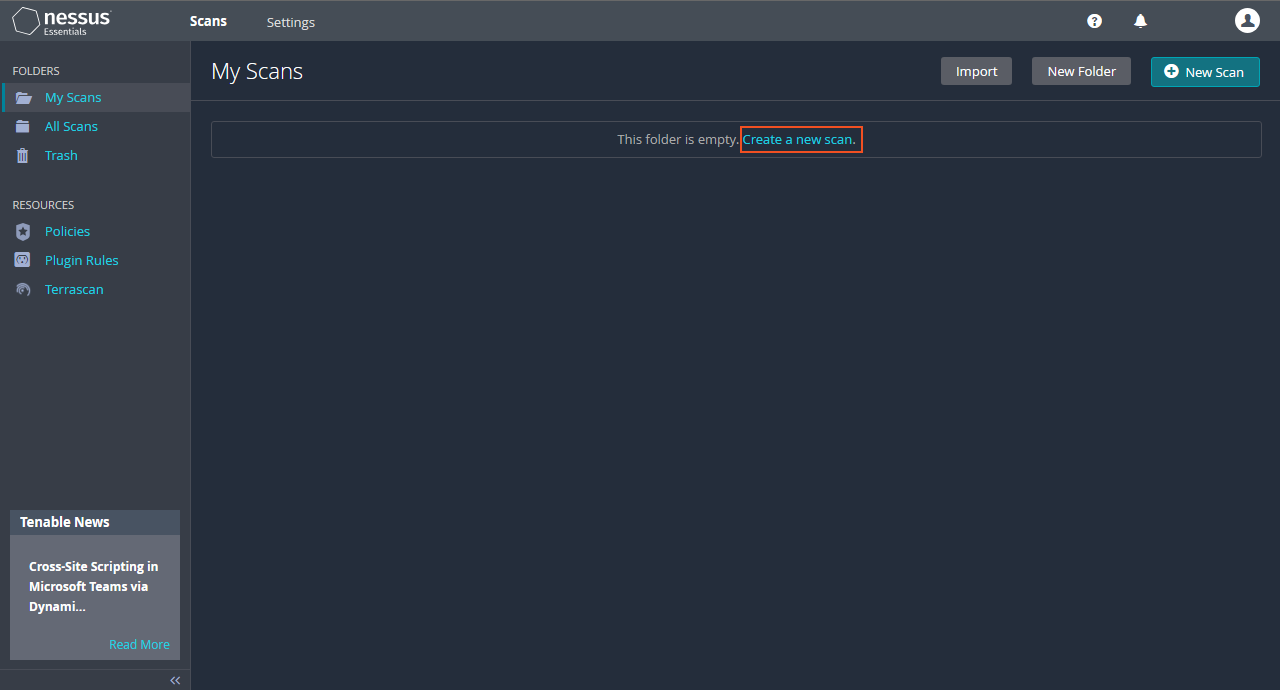
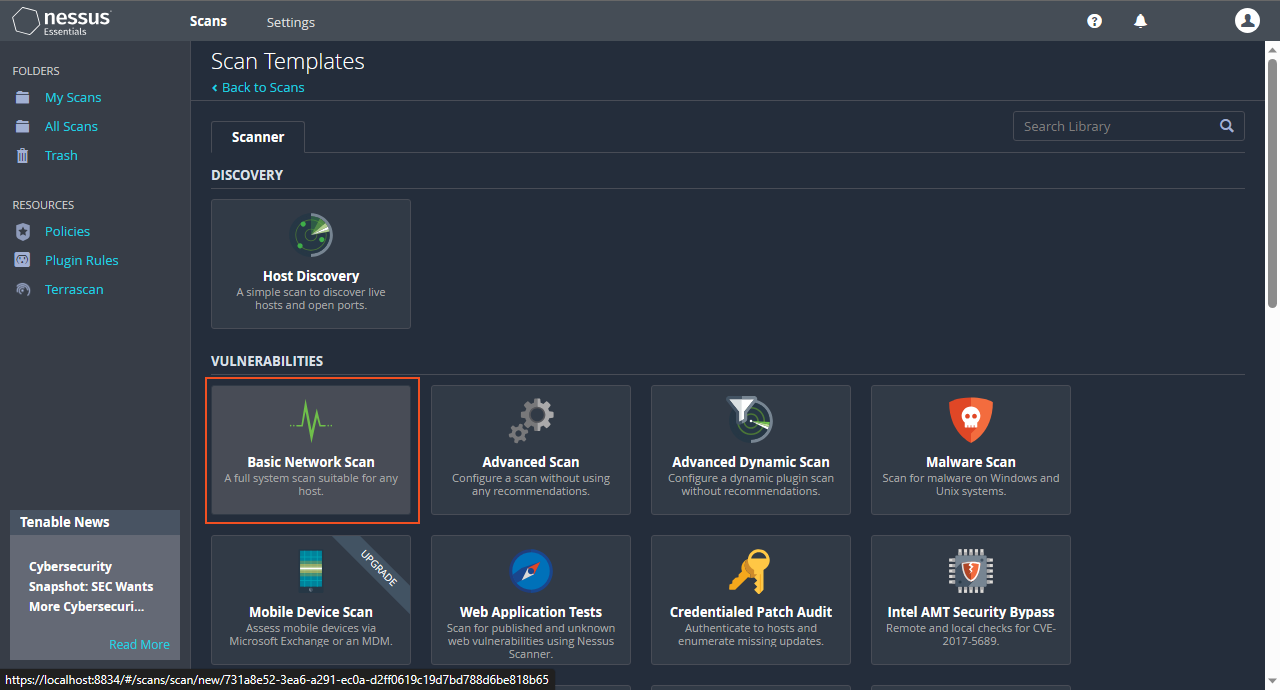
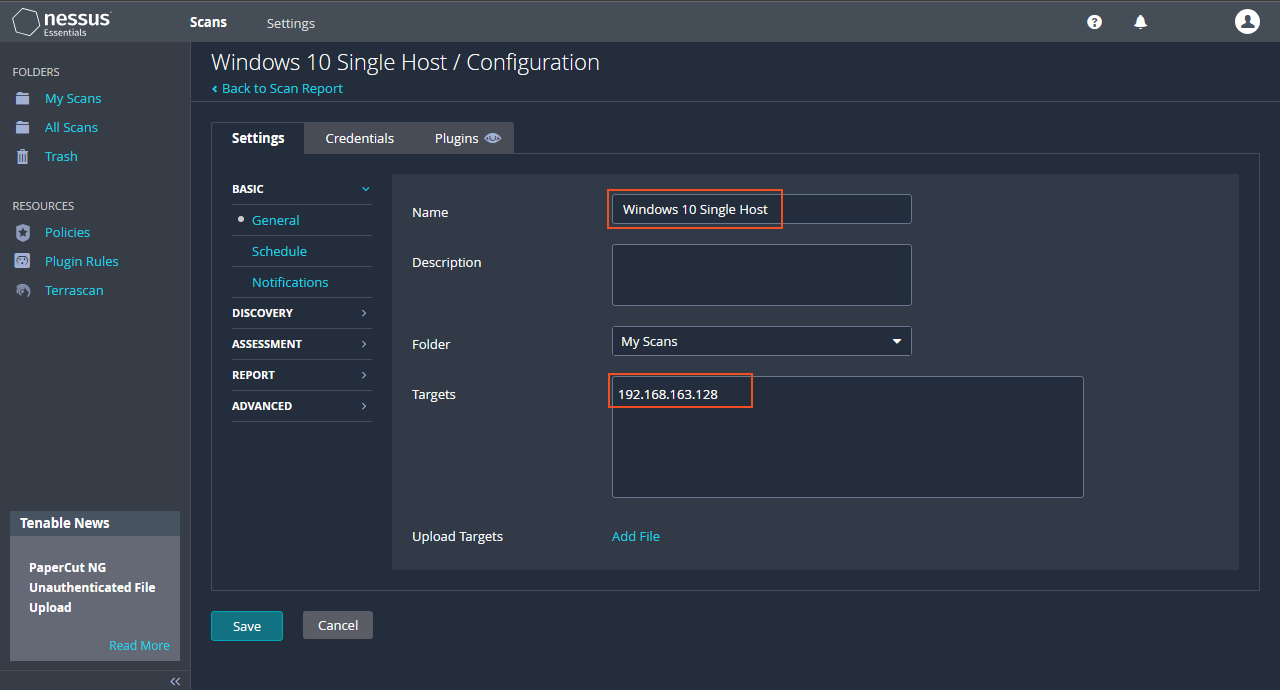
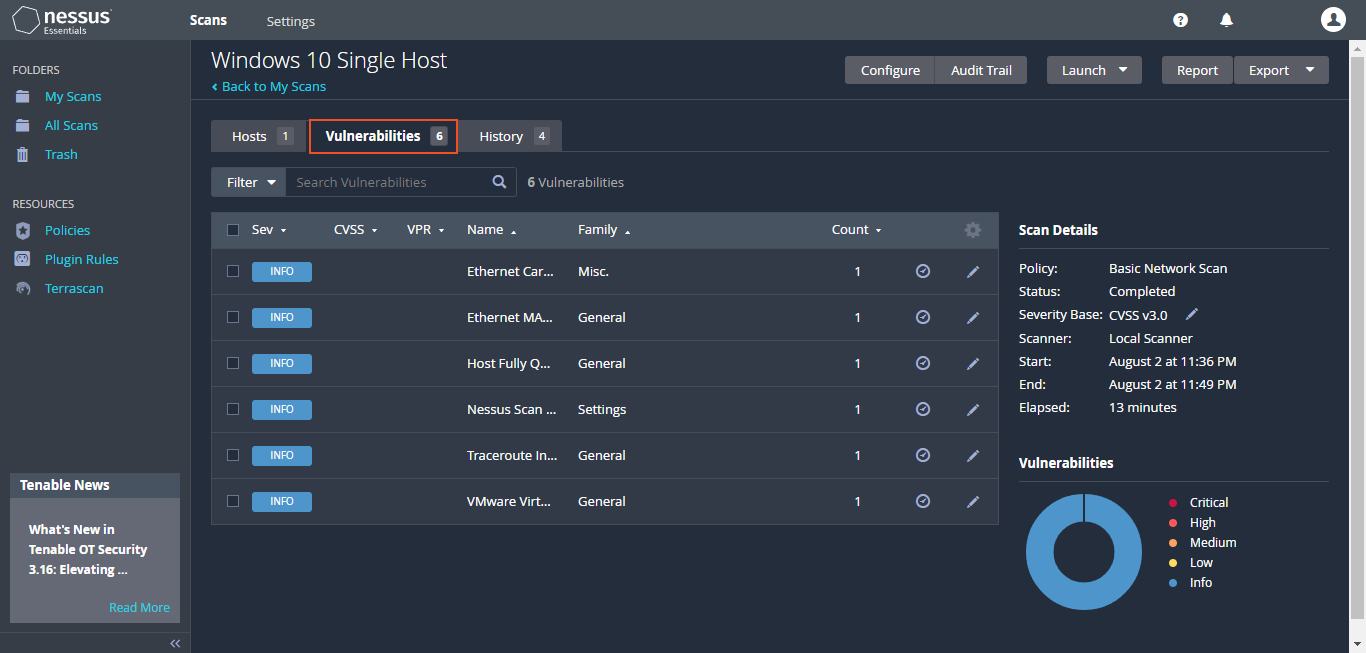
In Nessus Essentials, I start by creating a new scan, opting for a "basic network scan". I name it "Windows 10 Single Host" and input the virtual machine's IP address as the target. Although am doing a manual scan, it's possible to do schedule regular scans, which would be more apt to organizations. Customization options include scanning common or all ports, with the latter taking more time.
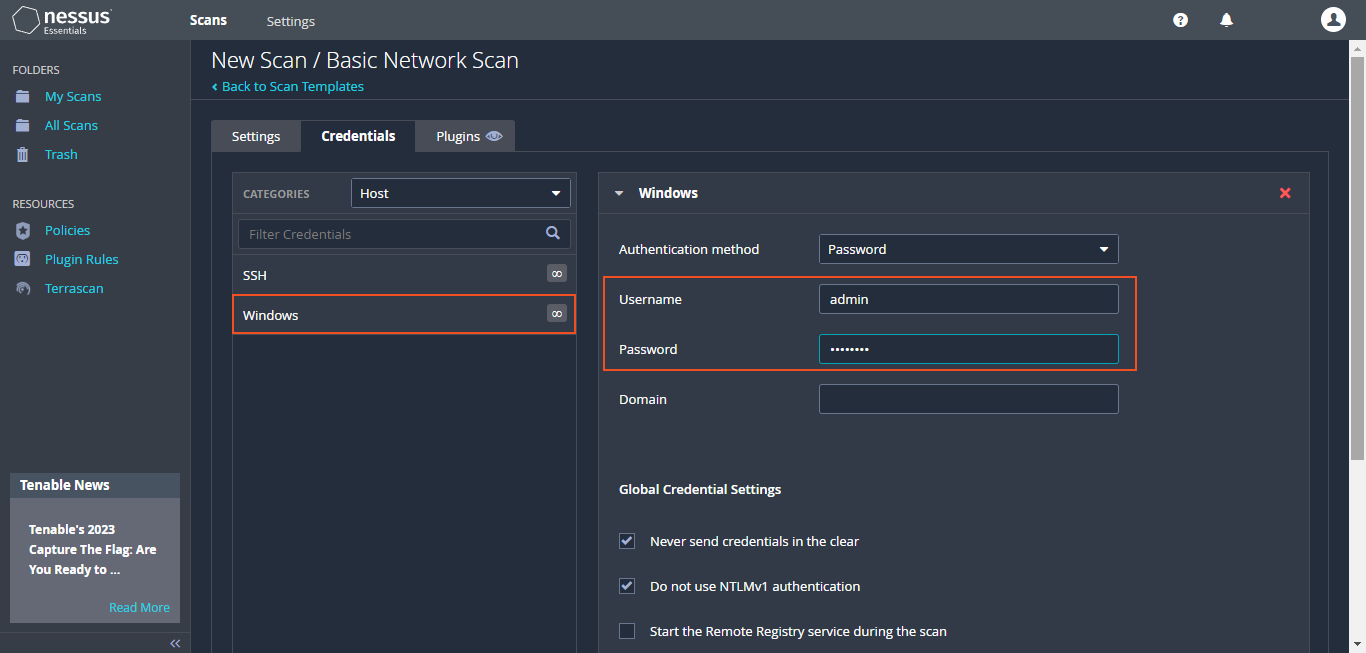
There's a range of settings to explore. The credentials page allows me to enter the virtual machine's username and password. By providing these credentials, Nessus can perform a more comprehensive scan, examining the registry, file system, and other aspects to discover potential vulnerabilities arising from "deprecated software or insecure services".
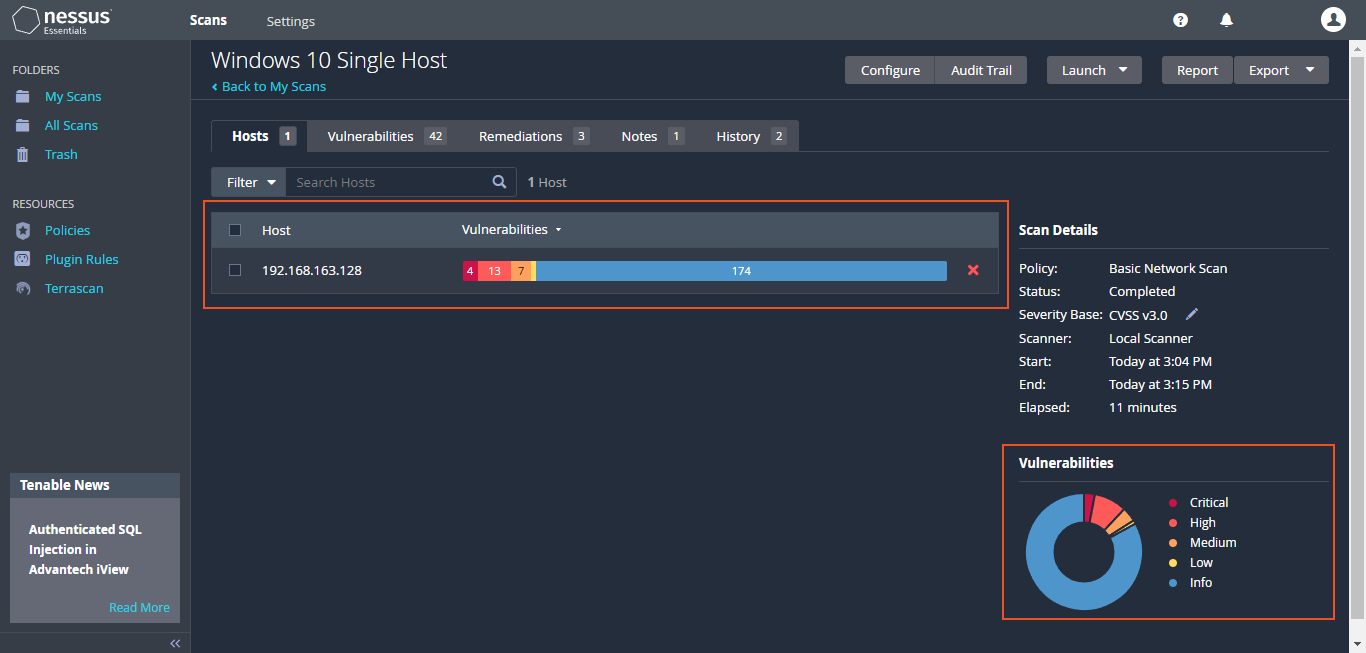
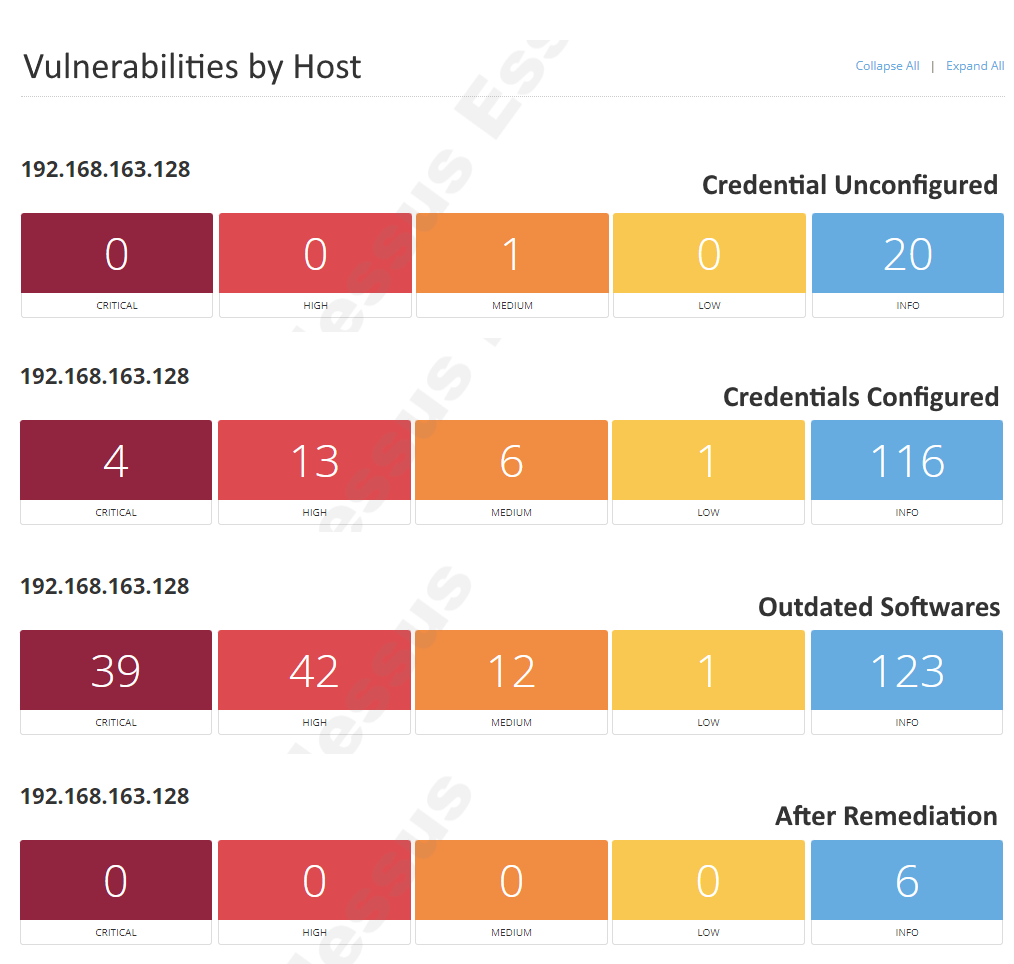
After setting up the scan, the scan was run until completion. Once finished, the details were clicked on, and approximately "17 vulnerabilities" were observed on the virtual machine. In the scan results, different colors indicate the severity level of vulnerabilities— "blue for info, green for low, yellow for medium, orange for high, and red for critical". These color codes help in quickly identifying the severity of each vulnerability, allowing prioritization and addressing the most critical ones first.
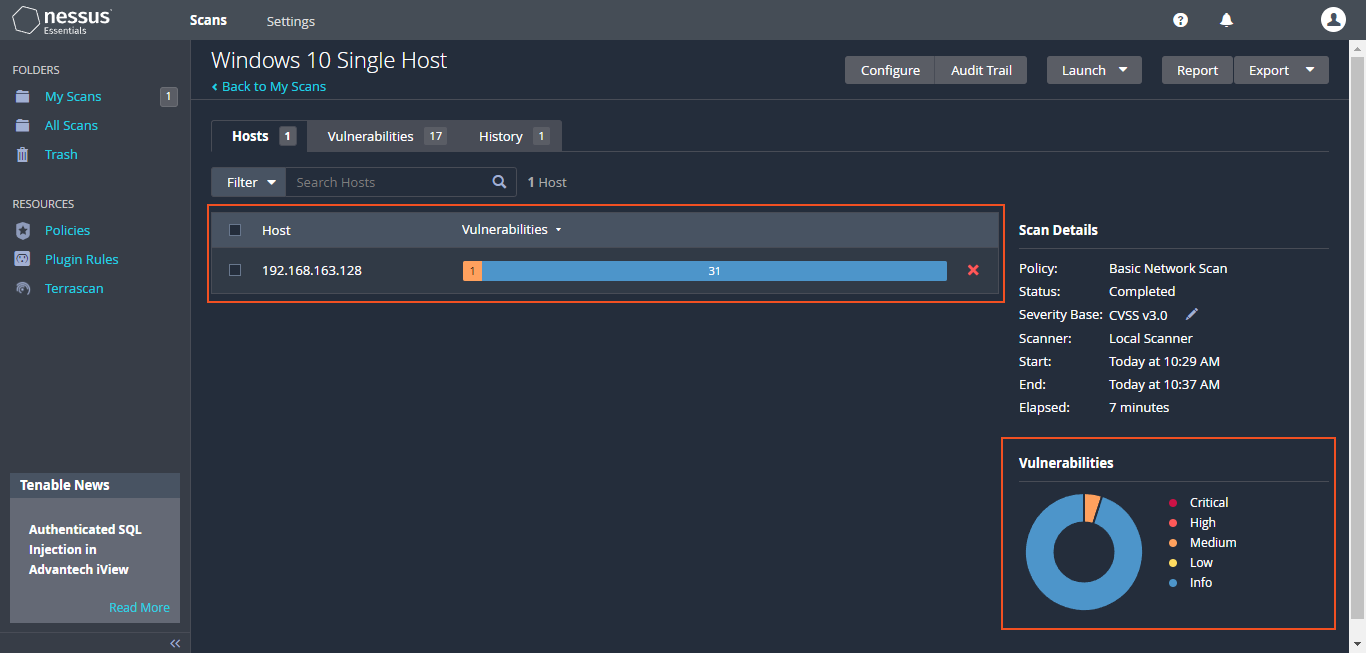
The approach varies by organization. Many prioritize "critical and high-level issues", sometimes overlooking medium or low-severity concerns due to the overwhelming volume of urgent matters. This can result in reduced focus on less critical vulnerabilities. Additionally, as "no credentials" were used for the scan, some vulnerabilities within the VM might not be detected.
Next, I'm going to set up the virtual machine to accept "authenticated scans." After that, I'll configure the VM for credentialed scans and provide "necessary credentials to Nessus". Once everything is set up, I'll attempt to rescan the virtual machine with credentials and compare the results with the previous scans I have examined. This process will allow me to gain a deeper understanding of the "security posture of the system and identify potential vulnerabilities" that were not visible in the previous scans.
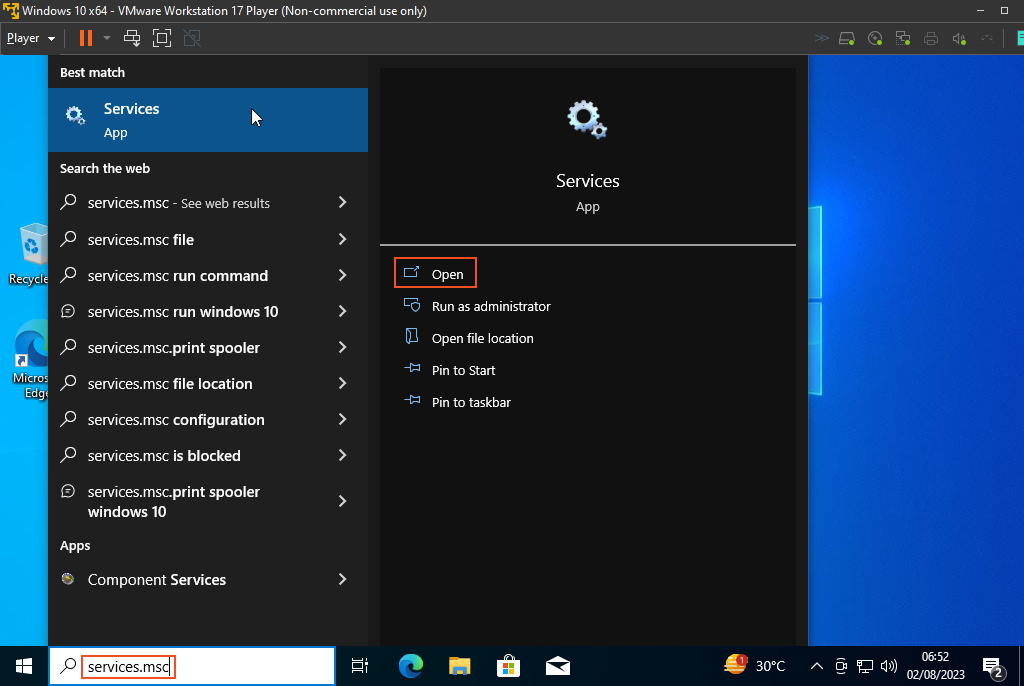
On the VM, I will go to "services.msc" to start this process and enable Remote Registry. Enabling Remote Registry will allow Nessus to connect to the VM's registry and perform a proper scan for vulnerabilities, including identifying insecure connections or deprecated cipher suites.

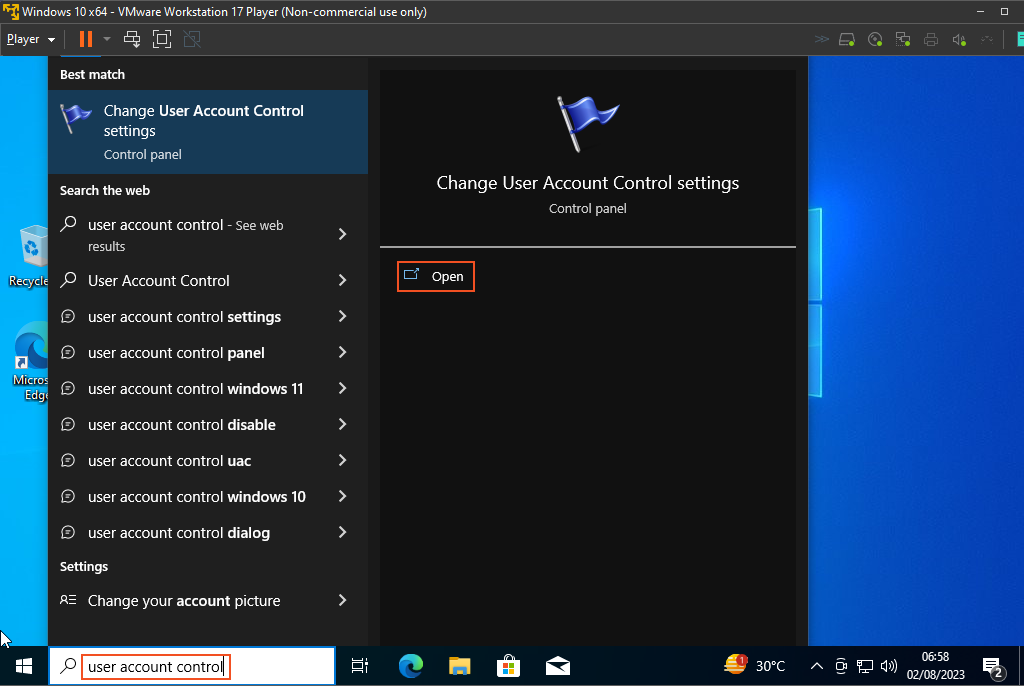
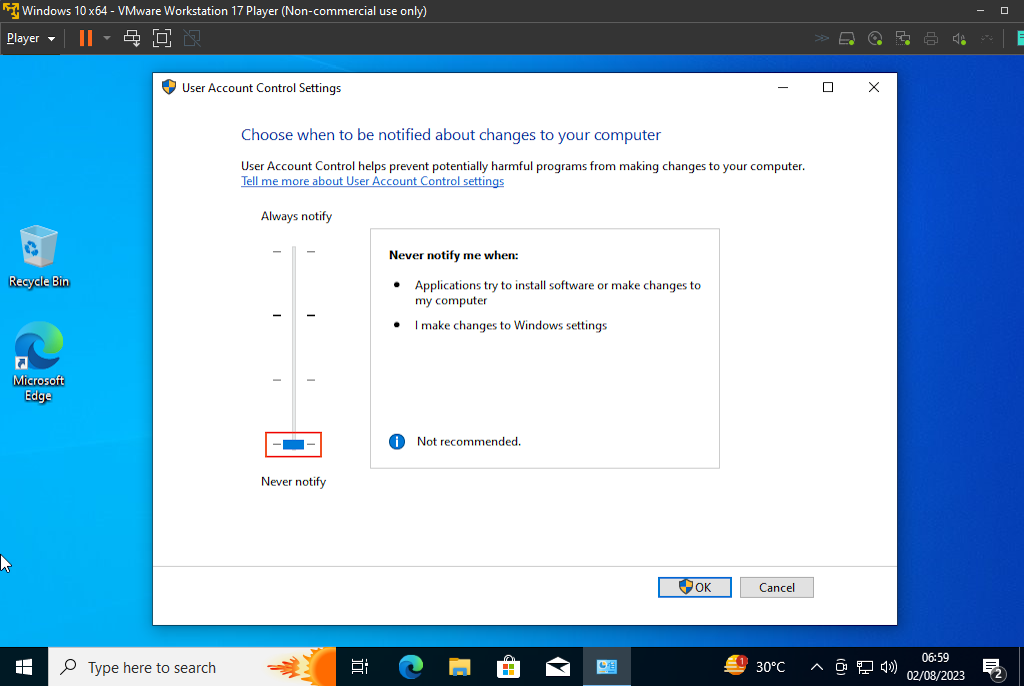
After completing the steps for enabling Remote Registry and scanning for insecure configurations, the next action is to disable User Account Control (UAC). However, I strongly advise against disabling UAC, as it could compromise the system's security. Instead, consider using the "Run as administrator" option when required for tasks that need elevated privileges.
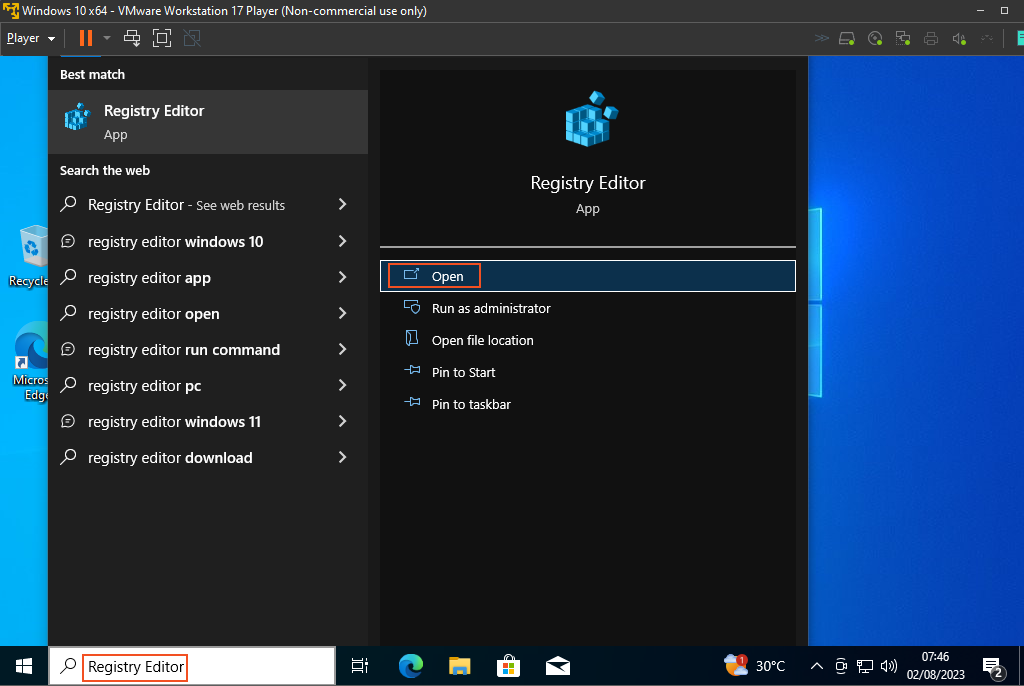
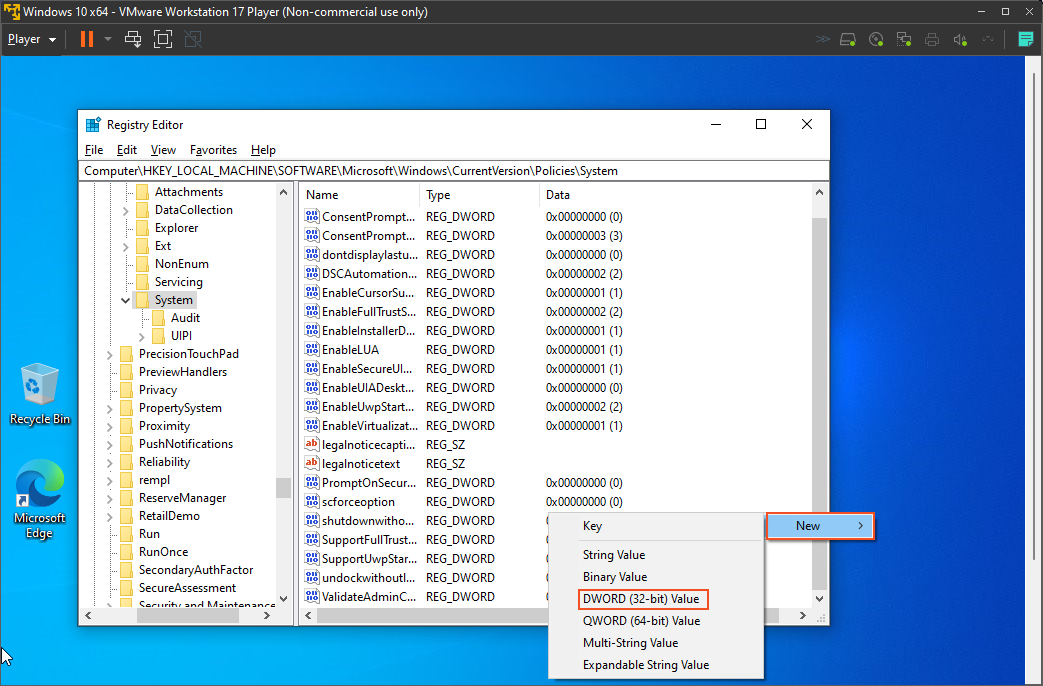
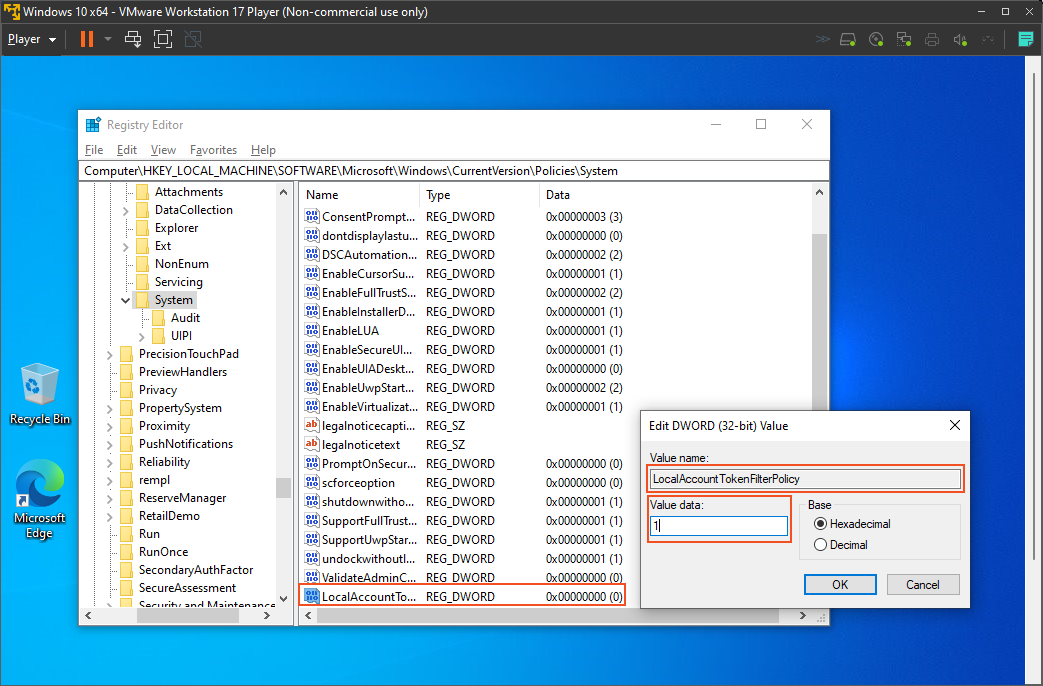
Next, I will open the registry and add a key (HKEY_LOCAL_MACHINE\SOFTWARE\Microsoft\Windows\CurrentVersion\policies\system\LocalAccountTokenFilterPolicy) that will allow the remote account to establish a connection. After that, I'll connect to the registry and add another key to further disable User Account Control (UAC) for the remote account. This adjustment will facilitate the connection during our scan process.
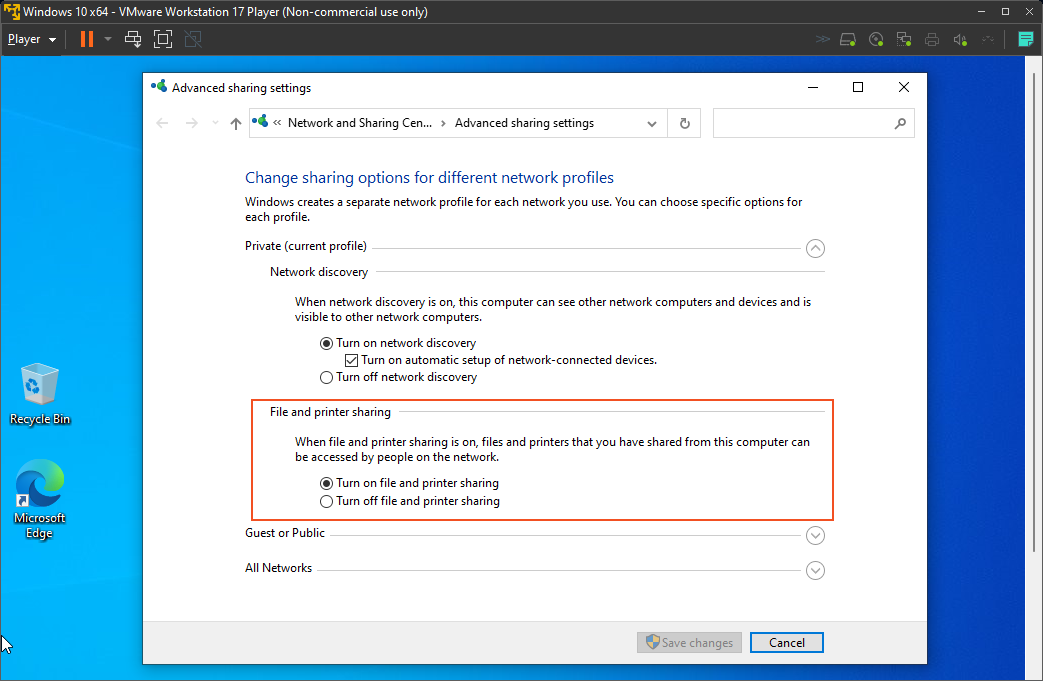
Next, I will proceed to "Enable file and printer sharing". Enabling file and printer sharing on Windows is advantageous for Nessus assessments. This capability empowers Nessus to access shared files, amplifying scan precision and breadth through the analysis of configurations and logs.

After implementing these modifications to the VM, I proceeded to commence an additional scan using Nessus. Additionally, I provided the VM's "username and password" as credentials. This inclusion allows Nessus to access essential information stored within the VM's registry, leading to a thorough and precise scan.
This latest scan has revealed approximately "4 Critical vulnerabilities," . This increase is attributed to the Nessus's ability to delve deeper into the VM, made possible by the utilization of credentials.
Let's take a quick look at a selection of these vulnerabilities.
Severity : Critical - KB5028166: Windows 10 Version 20H2 / Windows 10 Version 21H2... Security Update
The system is exposed to remote code execution vulnerabilities (CVE-2023-35365, CVE-2023-35366, CVE-2023-35367) in Windows RRAS, information disclosure (CVE-2023-21526) in Windows Netlogon, and privilege elevation (CVE-2023-21756) in Windows Win32k.
Severity : High - Microsoft Windows HEIF Image Extensions RCE (March 2022)
The Windows HEIF Image Extension app on the remote host is vulnerable to remote code execution. An attacker exploiting this vulnerability could execute arbitrary code. To exploit the vulnerability, a program must process a specially crafted file.
Severity : Medium - Microsoft Paint 3D Multiple Vulnerabilities (June 2021)
The Windows 'Paint 3D' app installed on the remote host is affected by multiple remote code execution vulnerabilities. An attacker can exploit these to bypass authentication and execute unauthorized arbitrary commands.
Severity : Medium - Windows Snip & Sketch/ Snipping Tool CVE-2023-28303
An information disclosure vulnerability exists in Windows Snip & Sketch (Windows 10) and Snipping Tool (Windows 11) where parts of a cropped image that were to be removed are not completely deleted and can be restored if saved to the cropped image file.
Severity : Info - Microsoft Windows SMB Service Detection
The remote service understands the CIFS (Common Internet File System) or Server Message Block (SMB) protocol, used to provide shared access to files, printers, etc between nodes on a network.
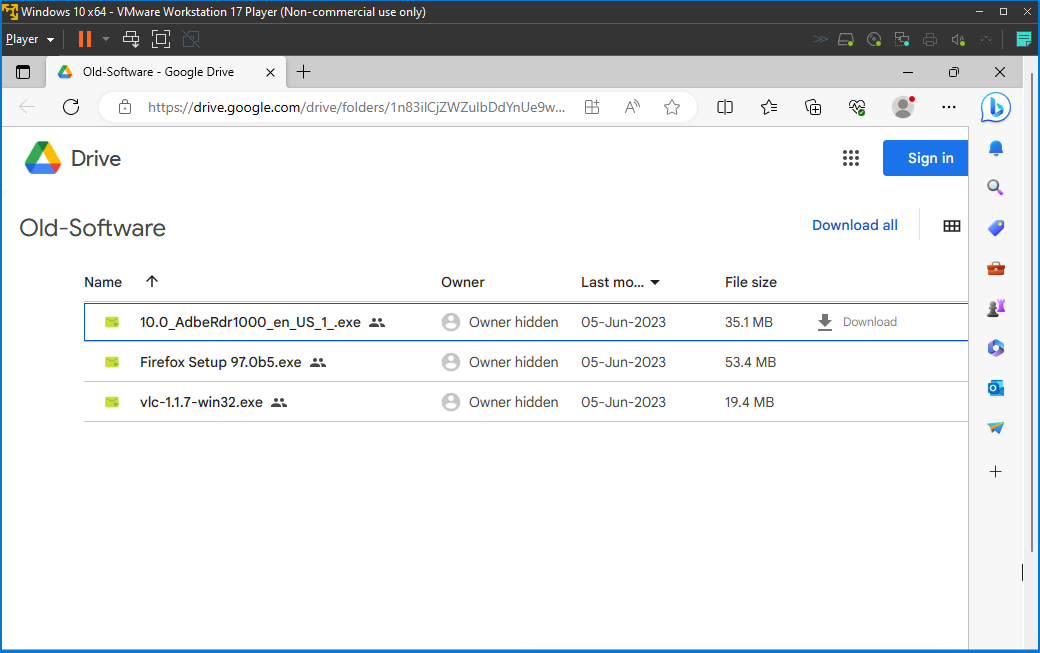
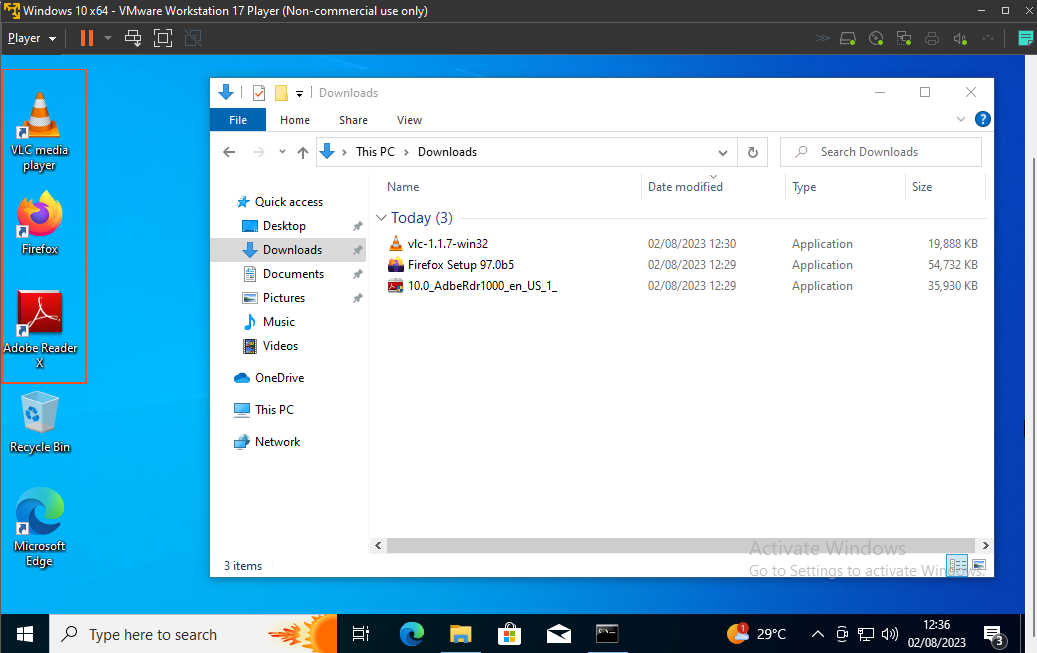
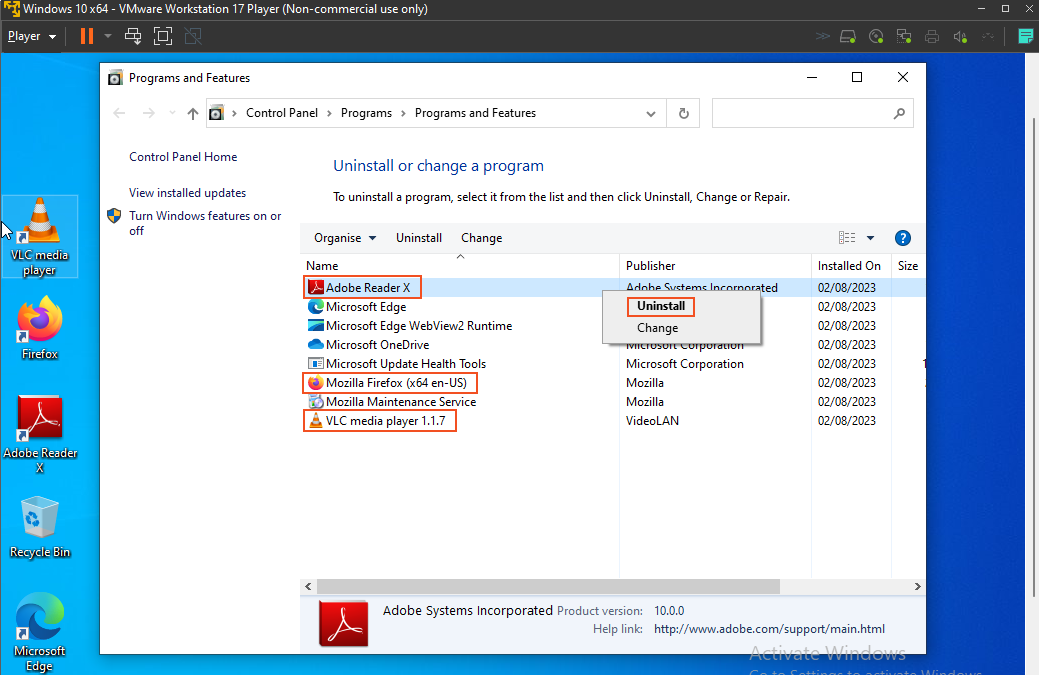
Before addressing these vulnerabilities, I'll purposely install three outdated software versions: an older Firefox, VLC player, and Adobe Reader. This intentional installation will create vulnerabilities, illustrating the risks of outdated software.
I downloaded these software applications from the link provided by one of my mentors, Josh Madakor (https://www.youtube.com/@JoshMadakor).
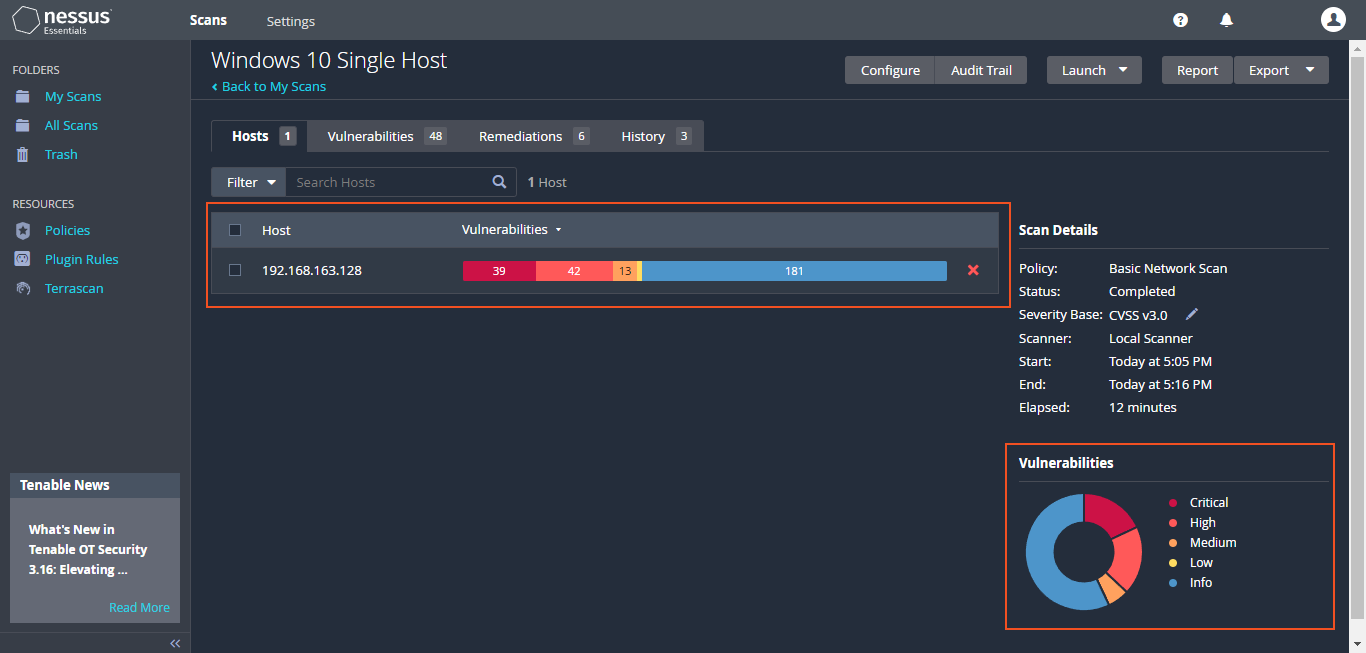
Upon re-running Nessus, the latest scan report reveals a "notable" surge in "Critical" vulnerabilities. This spike is largely a result of the deliberately installed outdated software. In the report's "Remediations" section, Nessus underscores this concern and provides guidance to address the vulnerabilities by upgrading the outdated software versions.
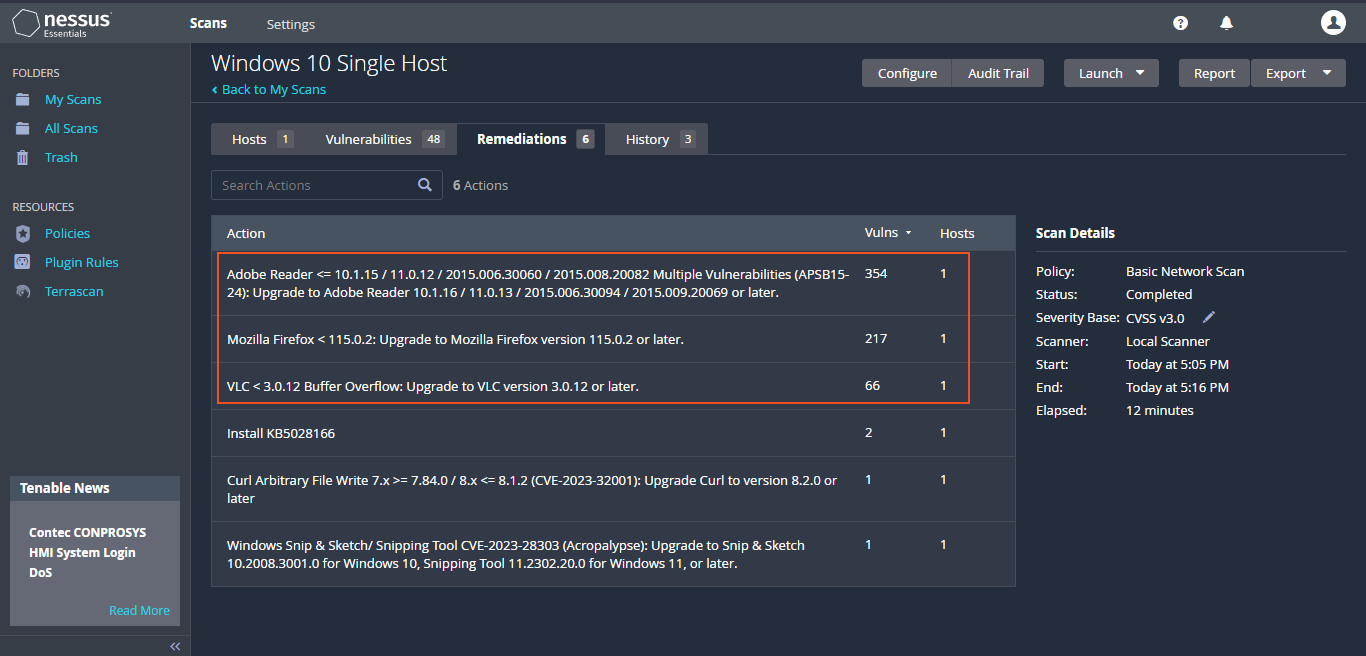
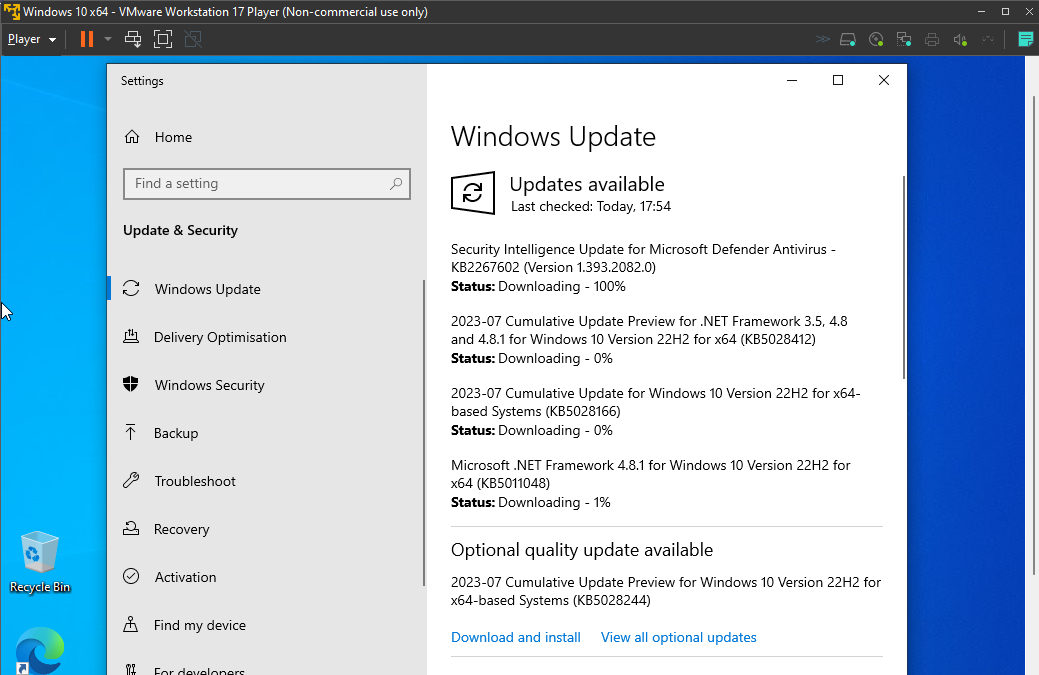
I will initiate the remediation process by "uninstalling outdated software and ensuring that Windows 10 is updated to the latest version". This proactive approach aims to address as many vulnerabilities as possible and enhance the overall security posture.
Upon addressing the vulnerability issues, I conducted another scan, and I'm pleased to report that all "CRITICAL, HIGH, and MEDIUM" vulnerabilities have been successfully mitigated. This outcome validates the effectiveness of the measures I implemented to tackle the vulnerabilities.
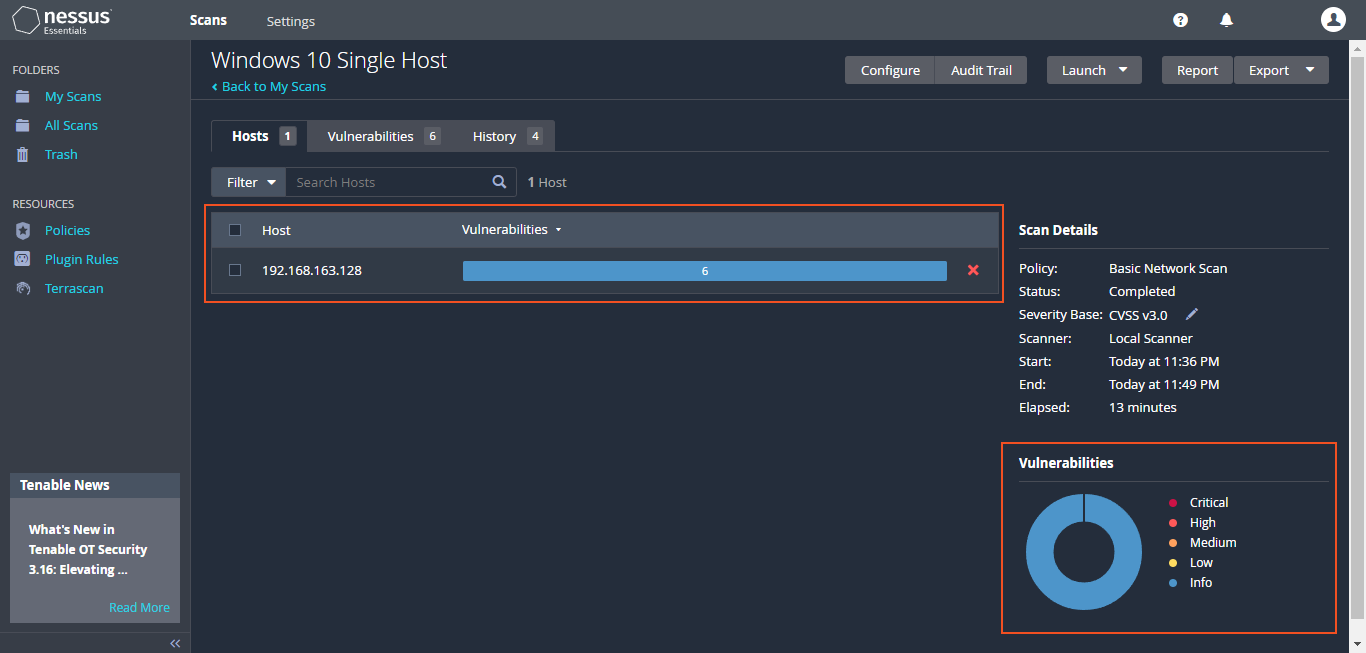
Here's a final comparison among the four scans conducted during this lab. Notably, many of the previously alerted vulnerabilities have now been resolved, showcasing the significant improvement achieved through the process.
In the course of this project, I have gained valuable insights into the vulnerability management and its pivotal role in maintaining robust cybersecurity. The project revolved around configuring and utilizing Nessus for vulnerability assessments, shedding light on crucial aspects of this process.
- Vulnerability Basics: I learned how to scan, identify, and remediate vulnerabilities effectively.
- Outdated Software Impact: Outdated software significantly contributes to vulnerabilities, stressing the need for timely updates.
- Scanning and Remediation: Scanning and remediating emerged as core steps in vulnerability management.
- Automation Efficiency: Automation streamlines tasks like updating third-party apps and Windows.
- Collaboration and Policies: Collaboration across departments and established standards are essential in larger organizations.
- Secure Build Standard: Building security before production minimizes vulnerability risks.
- Mitigating Real Risks: The project underscored the importance of promptly addressing vulnerabilities to mitigate real risks.
- Real-world Significance: Vulnerability management's practical implications protect systems and data.
In conclusion, this project has been a valuable learning experience that has deepened my understanding of vulnerability management, its intricacies, and the effective strategies to mitigate potential risks. The hands-on approach has provided practical insights that will undoubtedly be invaluable in future endeavors within the realm of cybersecurity.
. . .