
Running Active Directory in Home Lab with Oracle VirtualBox (Part 1):
Windows Server 2022 Setup
Project information
- Title: Active Directory Home Lab
- Organizer: Self
- Project date: June, 2023
- URL: ajithchandranr.github.io
Active Directory plays a vital role in internal penetration testing as it is widely used in Windows infrastructures by many organizations. As security enthusiasts, it's important for us to delve into this technology, grasp its ins and outs, and explore the various attacks that can be launched against it.
To prevent this post from becoming overly extensive, I'll break it down into segments, each focusing on the setup and configuration of specific aspects of the lab. Today's article will tackle the initial phase, which involves setting up the Windows Server 2022.
Now, without further ado, let's get started
. . .
Lab Requirements
-
Virtualization Software: Oracle VirtualBox and Oracle VM VirtualBox Extension Pack (options can be VMware Player, or VMware Workstation Pro)
-
Windows Server 2022. The evaluation copy can be found on the Microsoft Evaluation Center Link
Virtual Box and VMware Player are free to download.
. . .
Windows Server 2022 Setup
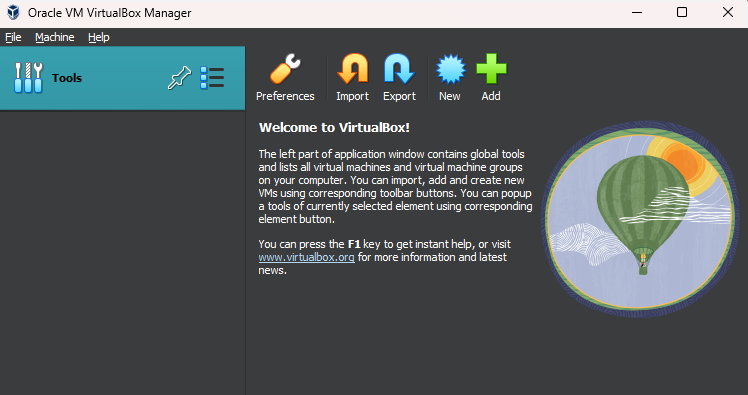
Once the ISO file is obtained from the Microsoft Evaluation Center, the next step involves setting up a new virtual machine. I am using Oracle VirtualBox for the lab.
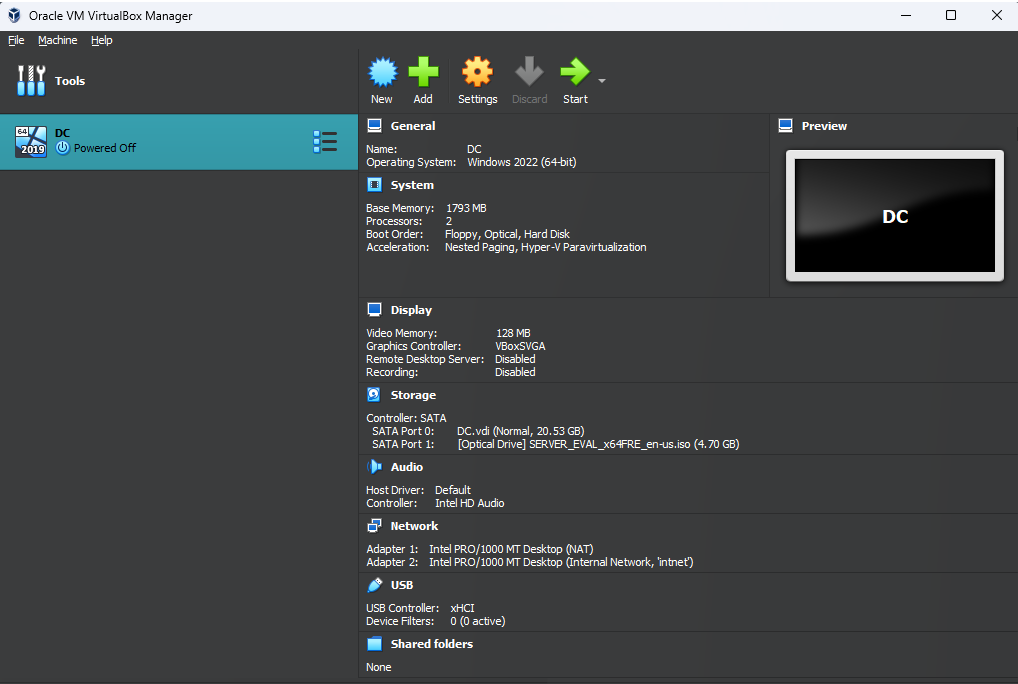
The VM specifications:
-
Processors: 2
-
RAM: 2 GB
-
Disk Size: a minimum of 20 GB
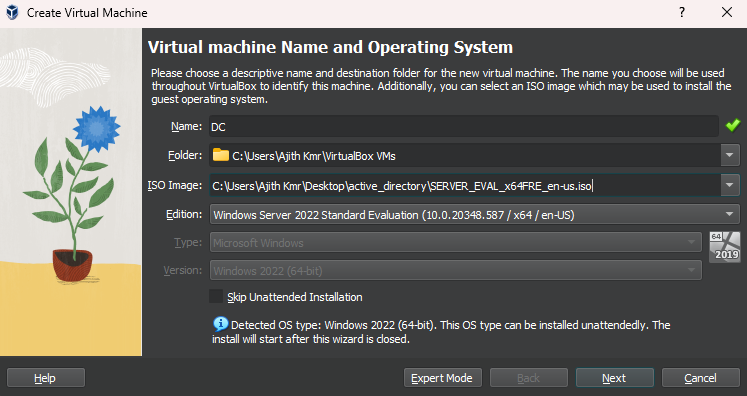
1. To create a new virtual machine, begin by clicking on Oracle VirtualBox"New". Then, access the drop-down menu next to "ISO Image" and select the "Windows Server ISO file" you have downloaded. Additionally, you can choose the "Skip Unattended Installation" option to speed-up the setup process.
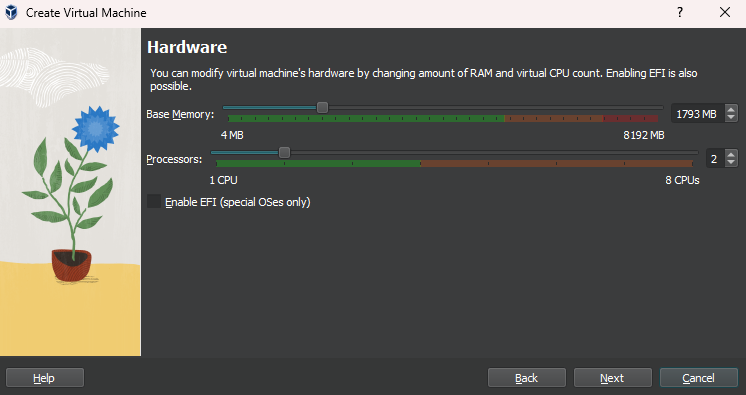
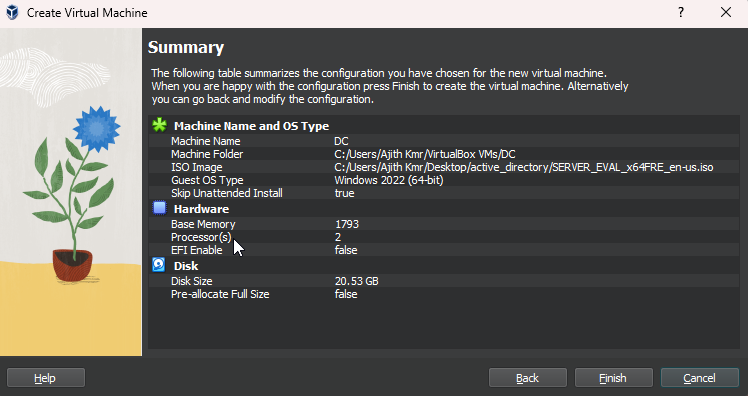
2. Next, we proceed to configure the "Hardware Specifications" for the virtual machine. As we are setting up a server with a higher workload compared to a typical workstation, we will allocate two (2) virtual processors to ensure optimal performance.
Furthermore, we will assign the virtual machine a memory capacity of "2 GB", which will provide ample resources for the lab activities we will undertake.
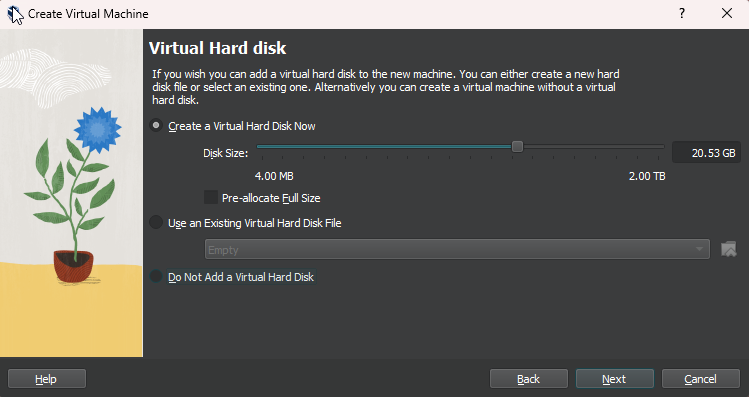
3. Next, we will proceed with the finalization of the VM initialization setup by clicking on the "Finish" button.
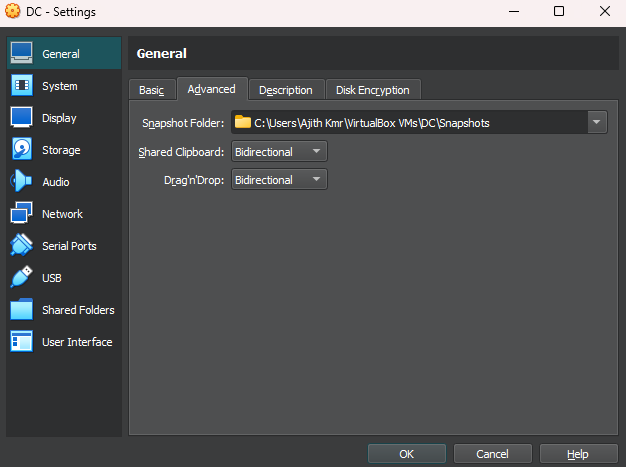
4. Prior to powering on the VM, let's access the "Settings" and make a few changes. In the "Advanced" section, set both "Share Clipboard" and "Drag and Drop" to "Bi-Directional." This allows you to easily copy and paste text (Ctrl+C, Ctrl+V) and transfer files by dragging and dropping between your host computer and the virtual machine.
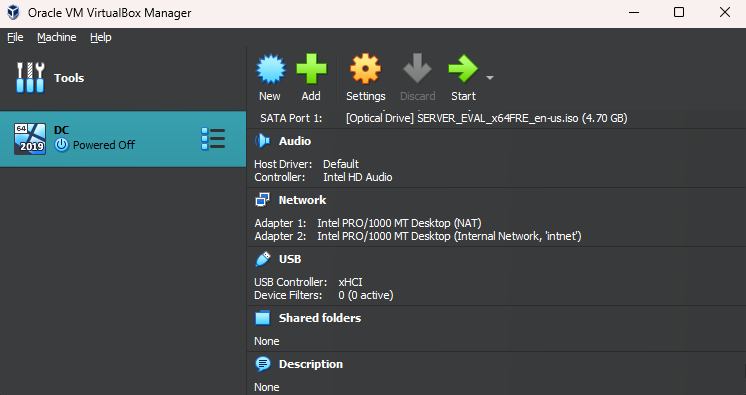
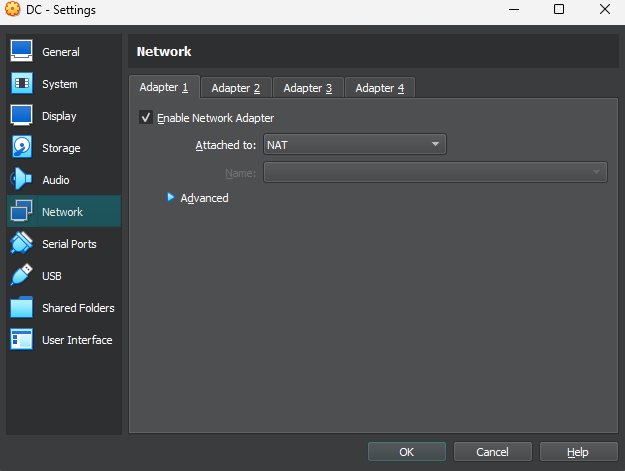
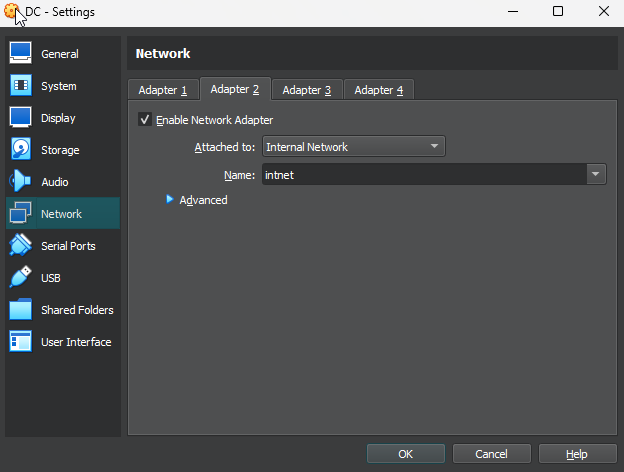
5. For the “Network Settings", we will have two network adapters; one is connected to the outside internet, and the other is connected to the private lab network.
-
Adapter #1 — NAT connects to the internet
-
Adapter #2 — intnet connects to the private network lab
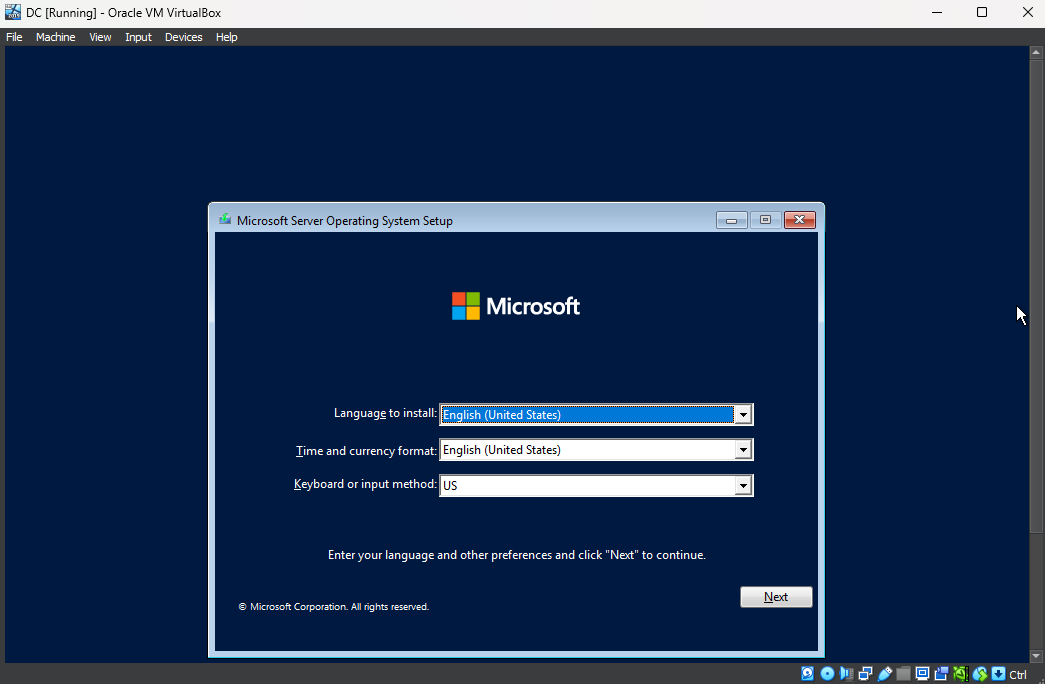
6. Now, power on the virtual machine.
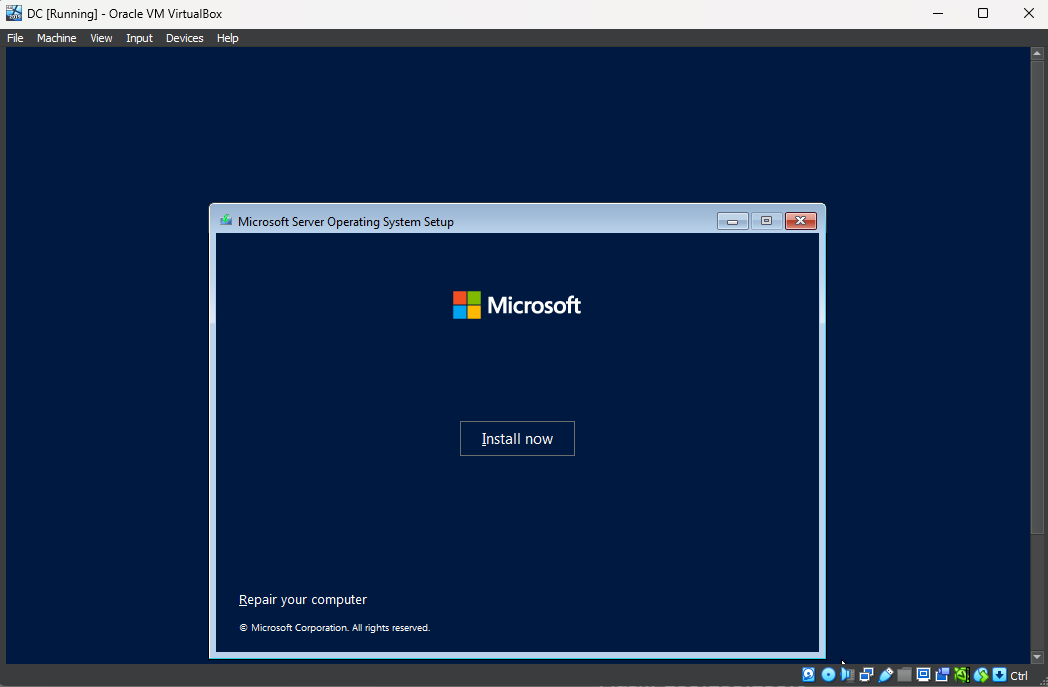
Once the Operating System Wizard pops up, click on "Next" and then "Install Now" to kick off the installation process.
7. Among the available installation choices, there are four options to consider. Two of them, labeled as "Desktop Experience," offer a comprehensive graphical user interface, while the remaining two do not. Our selection will be the second option, specifically "Standard Evaluation (Desktop Experience).
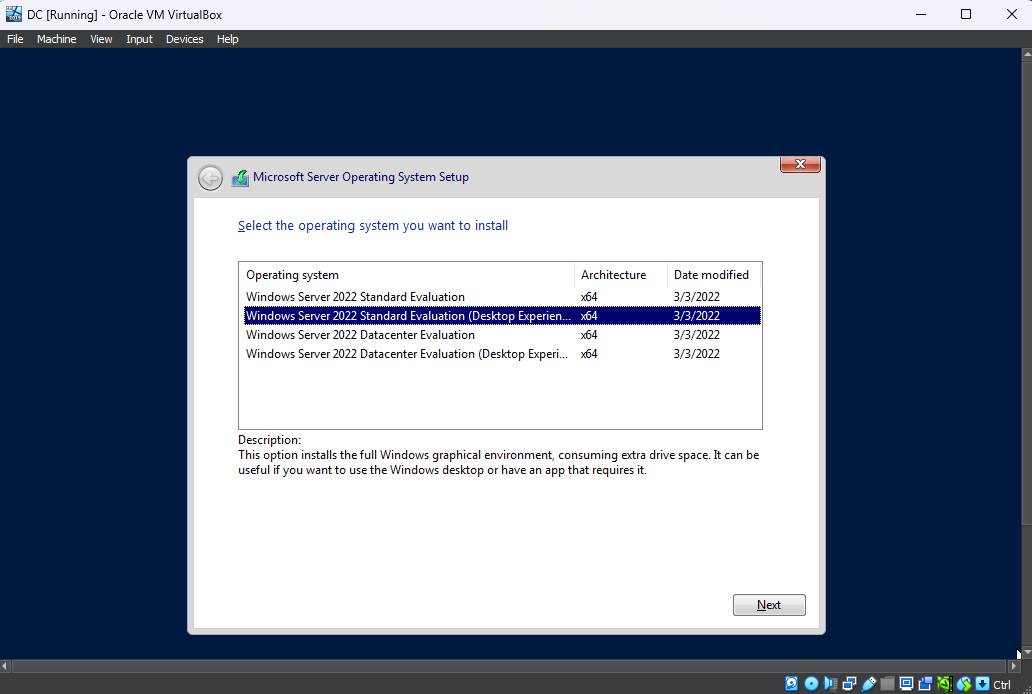
The Microsoft Windows Server 2022 licensing guide provides an explanation of the differences between the two options.
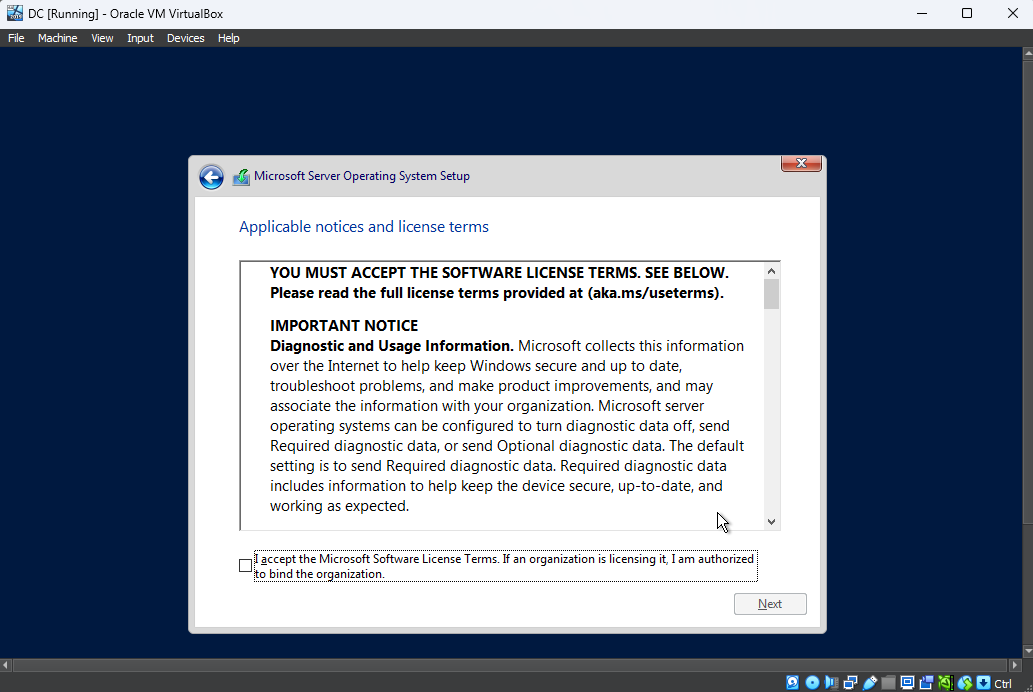
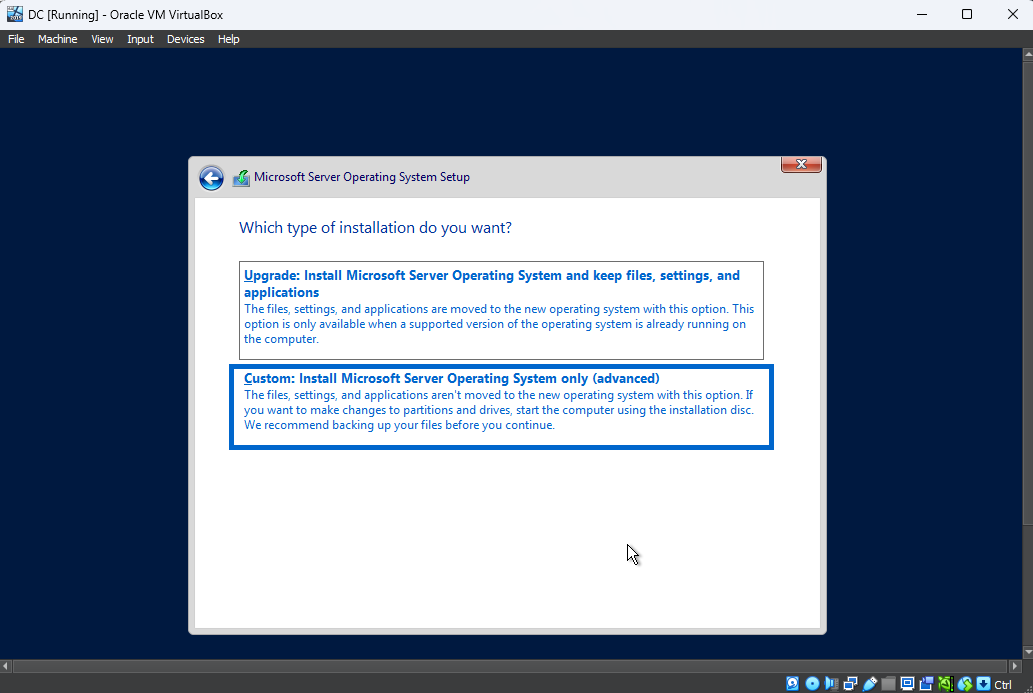
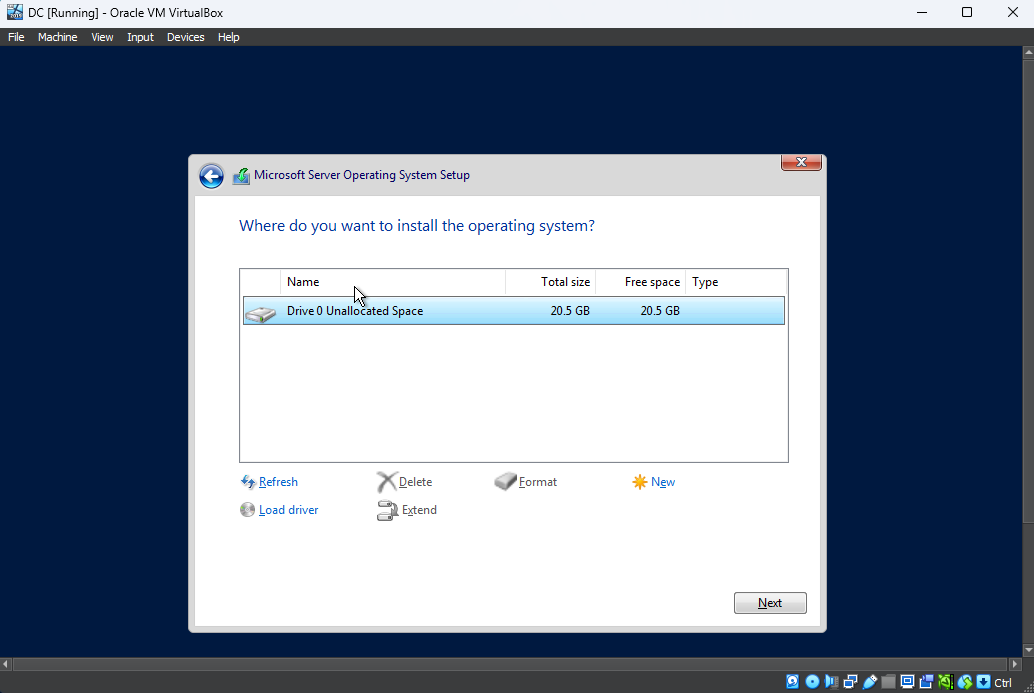
8. Tick the box for "Microsoft Software License Terms" and proceed by clicking "Next." Given that we are performing a fresh installation of the operating system, we will opt for the "Custom" option. Then, we will select the "Drive0 Unallocated Space" to install the system files.
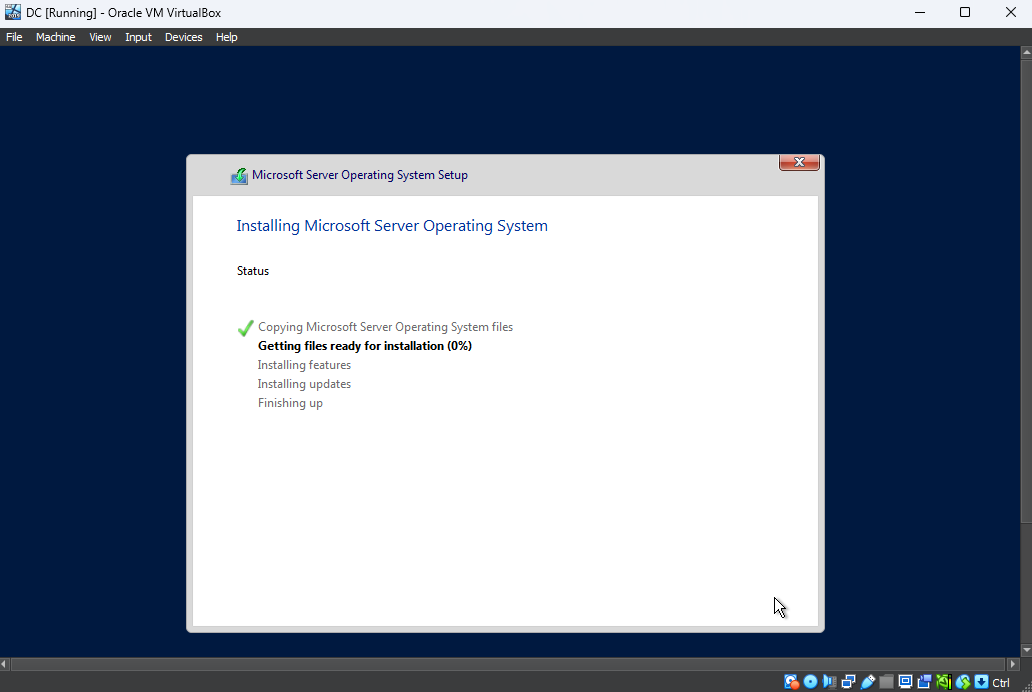
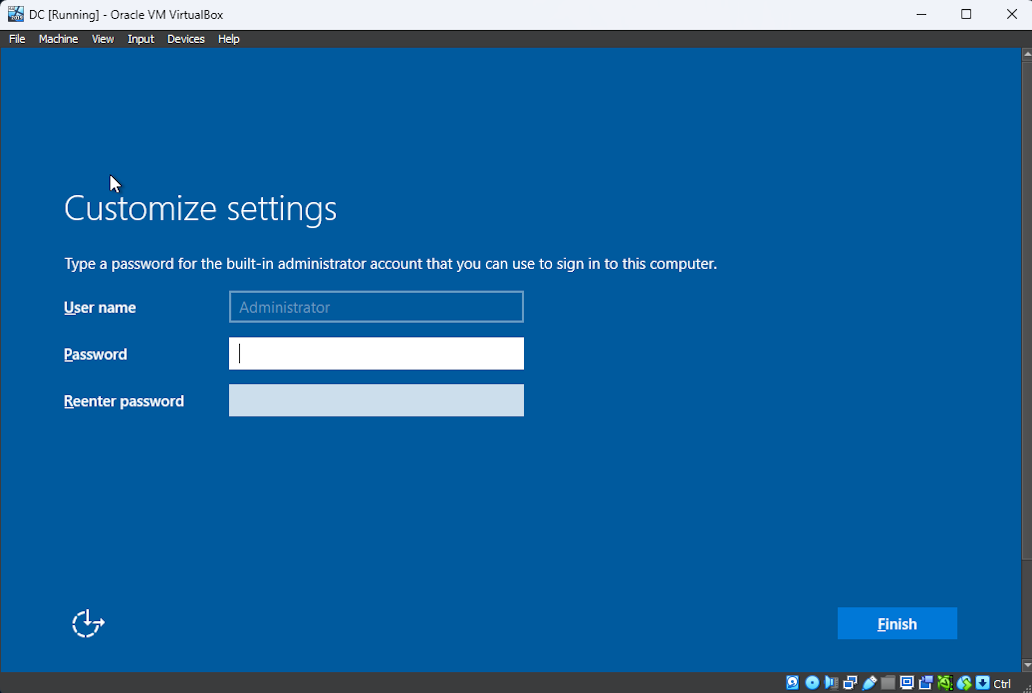
9. Following that, Windows will commence the installation of the operating system files, typically taking a few minutes to finalize the process. Once completed, the server will automatically reboot to implement the necessary configurations and settings.
Upon reboot, you will encounter the "Customized Settings" screen, where you can establish the password for the local built-in Administrator account.
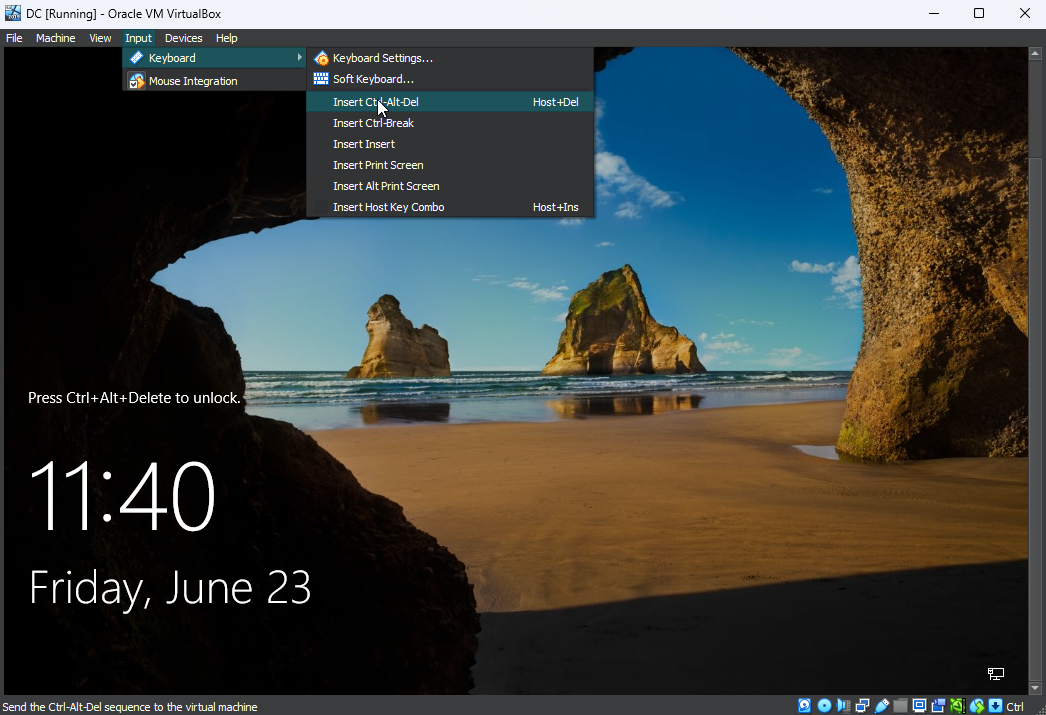
10. In a virtual machine (VM) environment, the conventional method of pressing Ctrl+Alt+Delete may not function as expected. Instead, to unlock the system, you can either navigate to "Input" then "Keyboard" and choose "Insert Ctrl+Alt+Del", or use the keyboard shortcut "Ctrl (left) + Del".
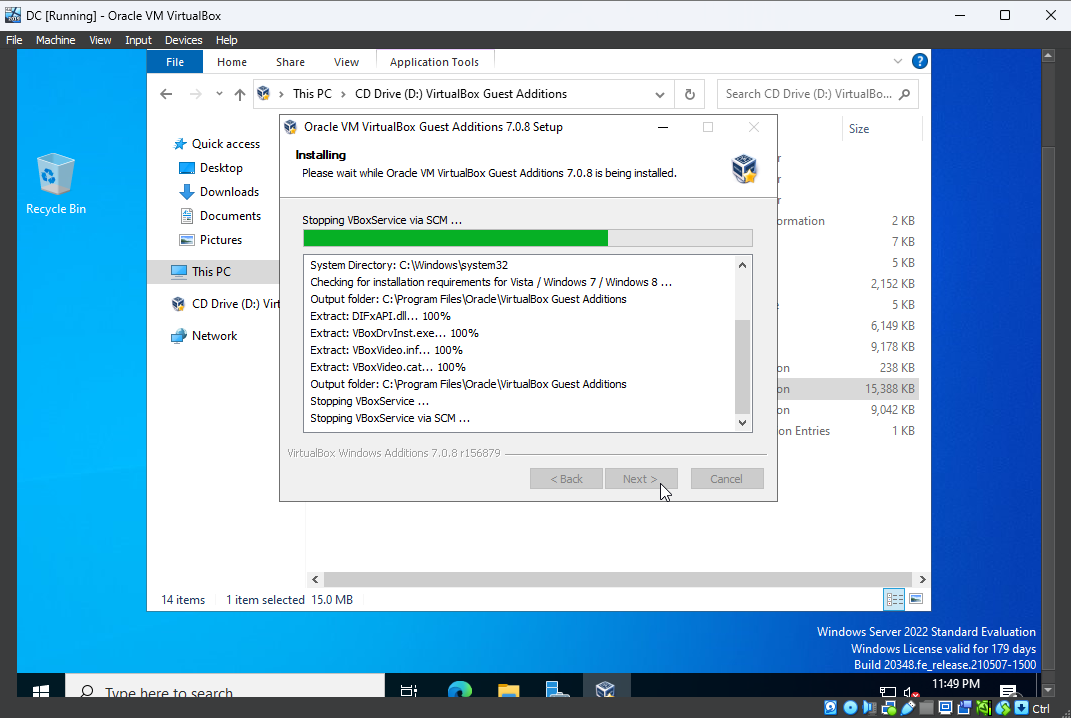
11. After logging into the server, we will start configuring a few things before installing Active Directory Services. First task will be to install the VM Guest Additions. This software enhances the overall user experience within the virtual machine. Currently, you may notice some mouse lag on the screen, which can be resolved by installing the Guest Additions. Additionally, when enlarging the VM window, the screen itself does not adjust accordingly, which can also be rectified by installing the Guest Additions.
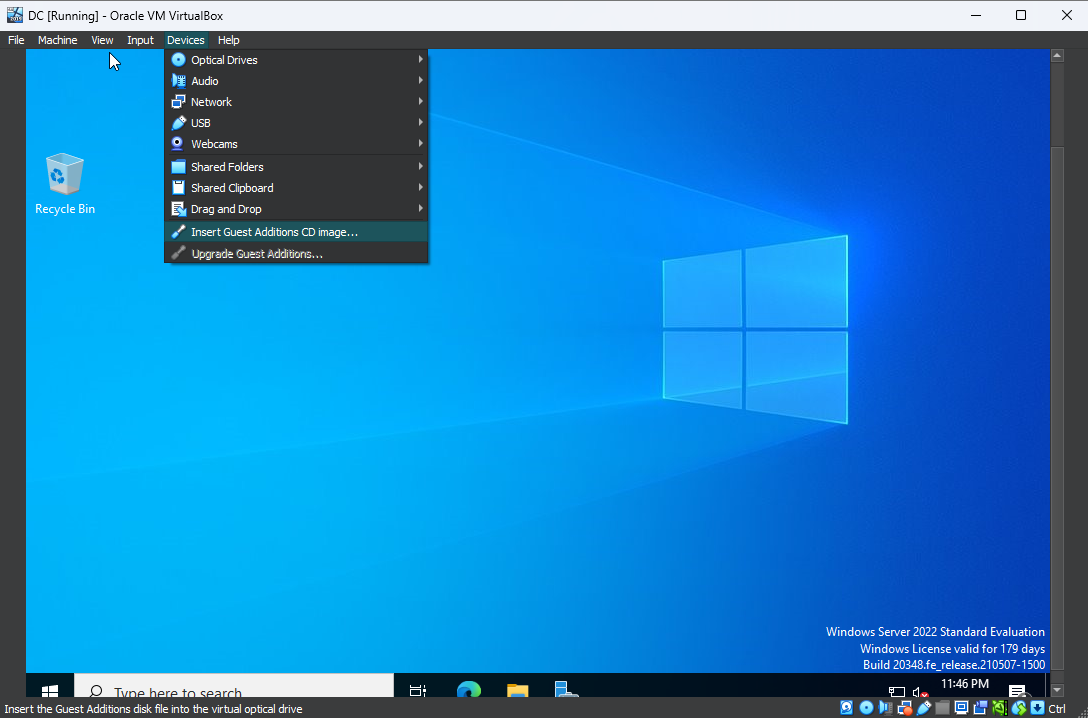
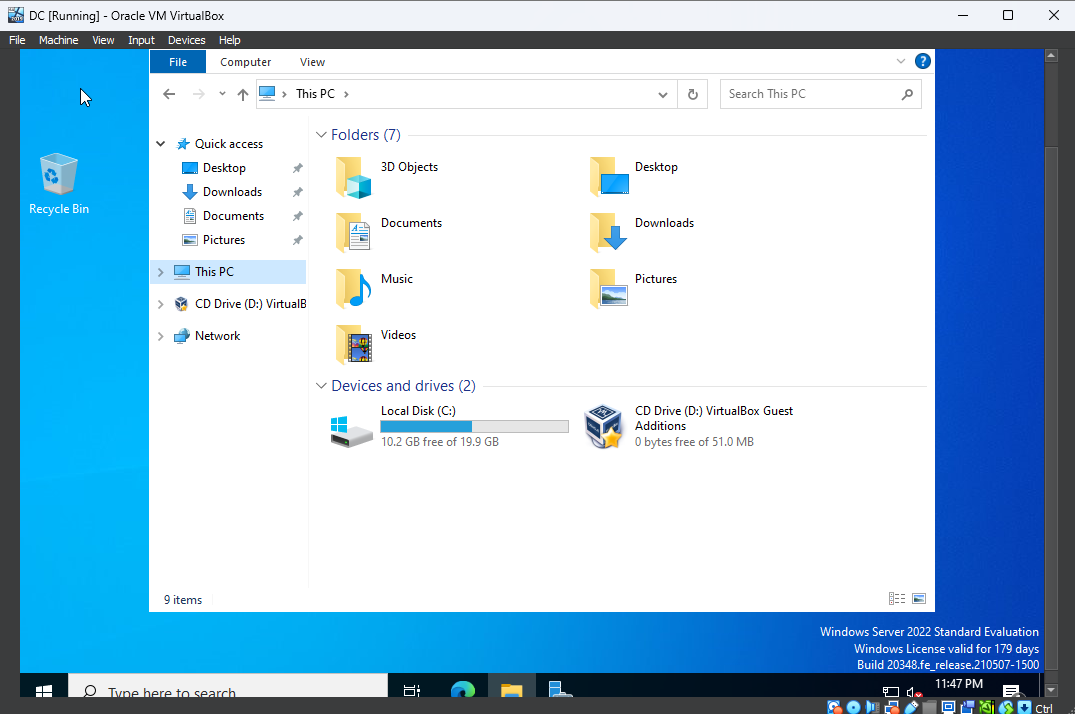
To locate the installation file, start by navigating to the "Devices" menu and selecting "Insert Guest Additions CD Image...". Then, open the "File Explorer" and access the specific
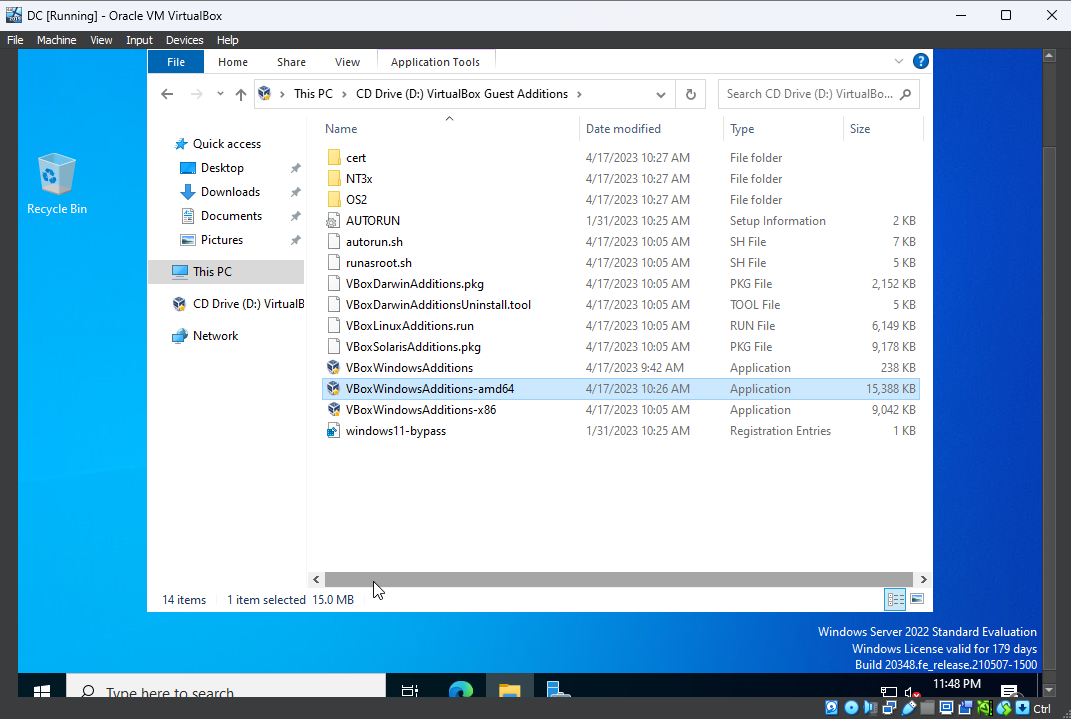
"CD Drive(referenced by its drive address, e.g., "D:"): VirtualBox Guest Additions". Inside that CD Drive, you can locate the file named "VBoxWindowsAdditions-amd64" .
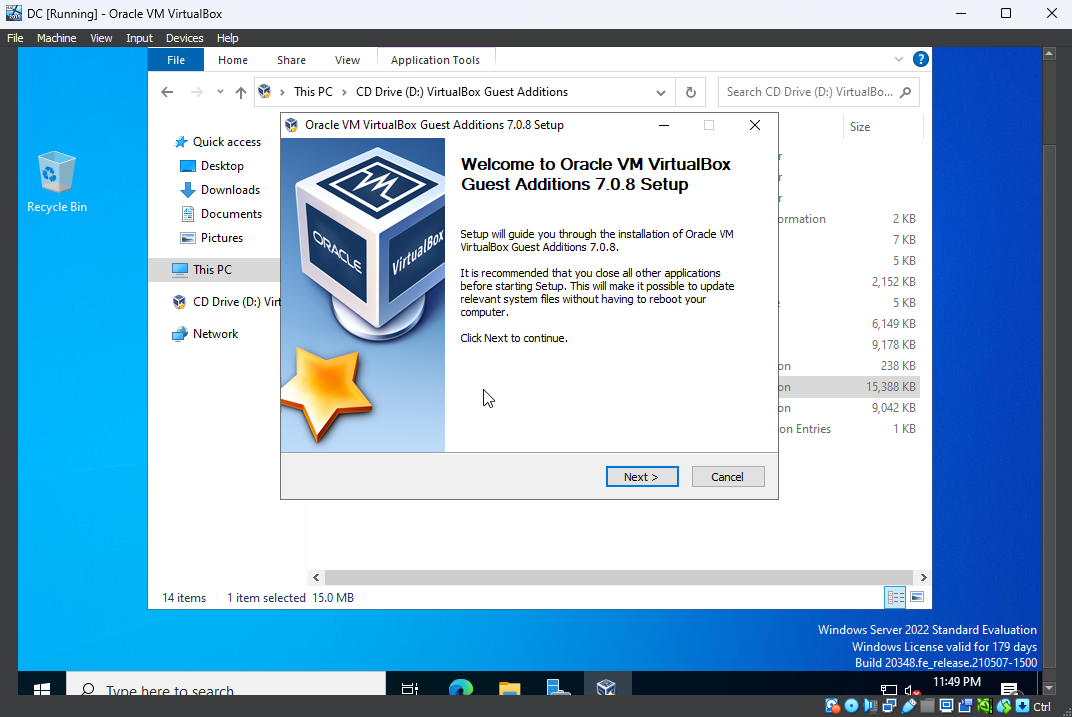
11. Open the VBoxWindowsAdditions-amd64 file and proceed by clicking "Next" to initiate the installation. Follow the prompts and complete the installation process. Once finished, choose the "Reboot Now" option to finalize the installation and reboot the system.

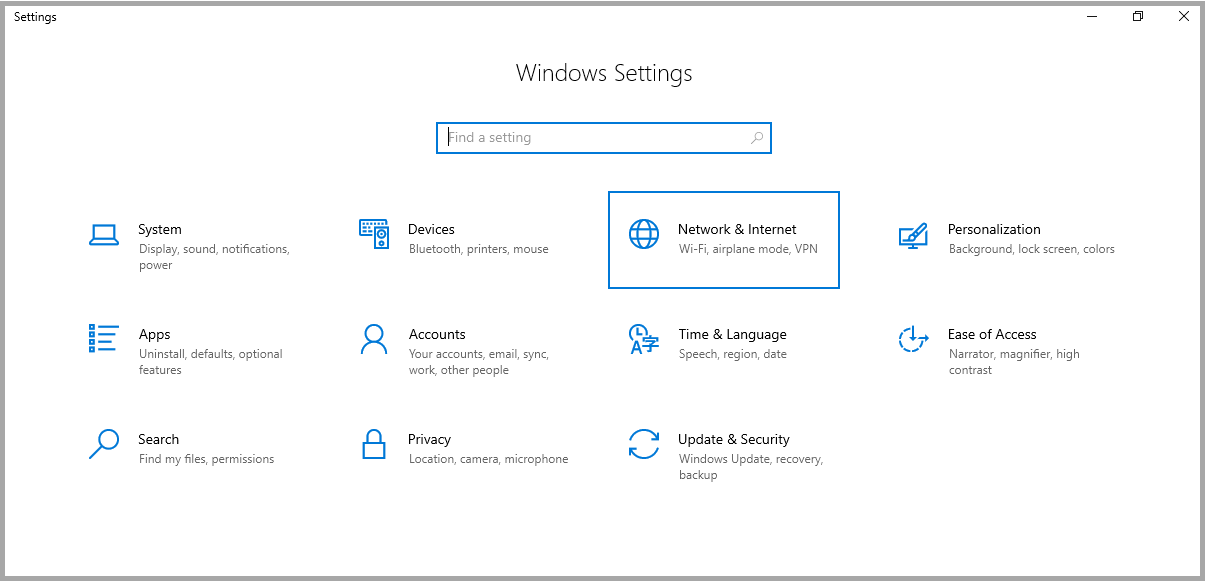
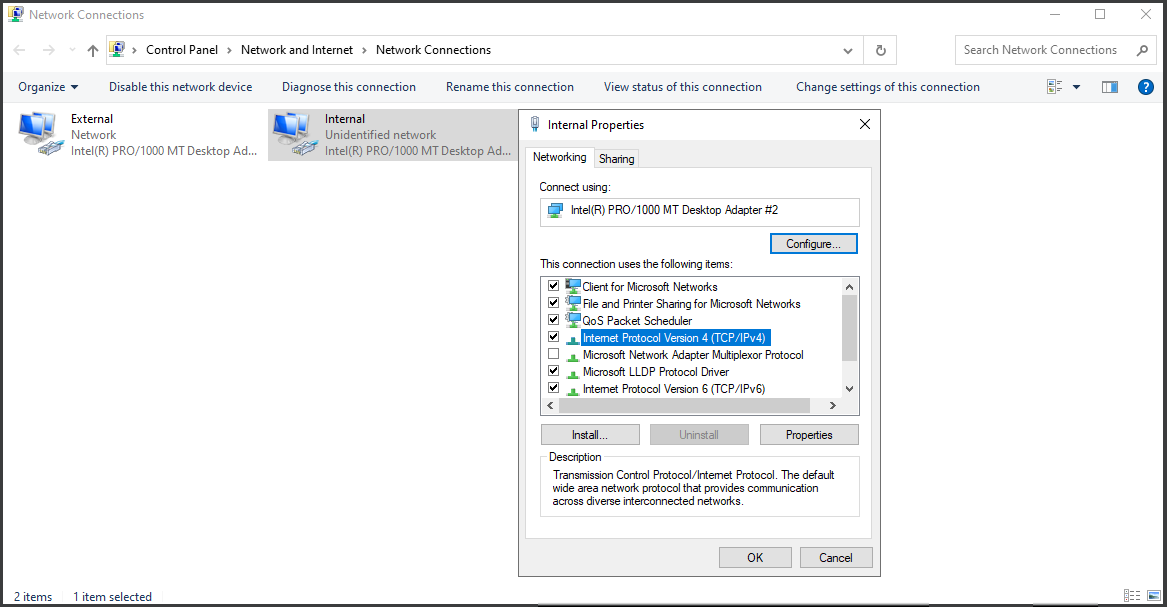
12. In the following step, we will proceed with configuring the two network adapters that were added during the initial setup of the virtual machine. To begin, navigate to the "Settings" page, then click on the "Network and Internet" section, and select "Change Adapter Options."
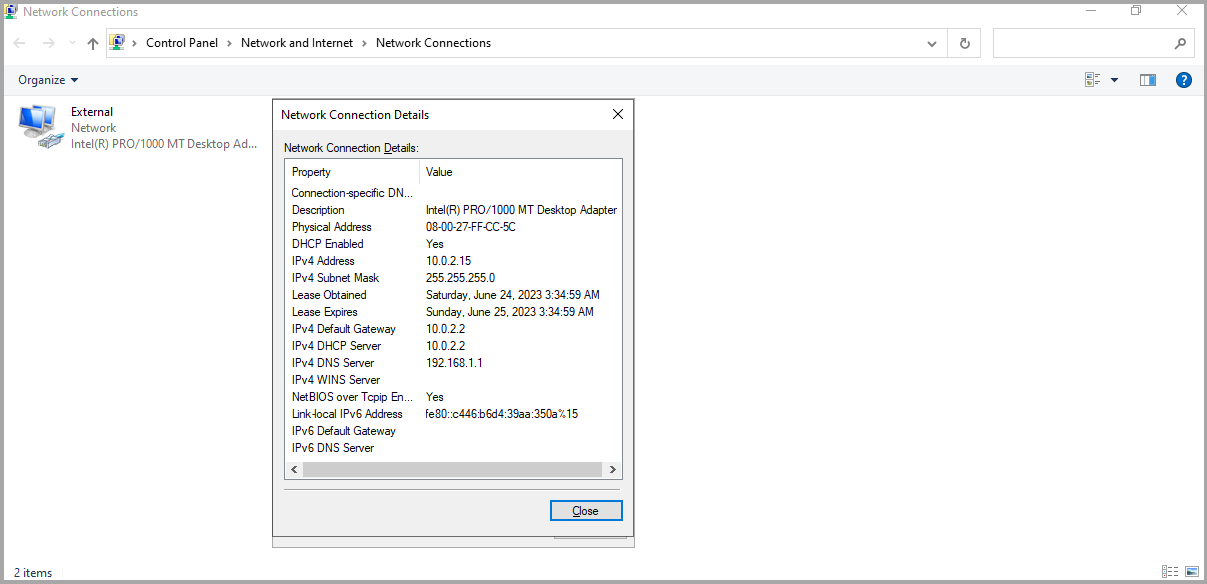
For the first adapter, labelled as "Ethernet0," we will keep it unchanged on the NAT network, allowing it to acquire an IP address from the home router. In my case, it is assigned to the 10.0.2.15/24 subnet.
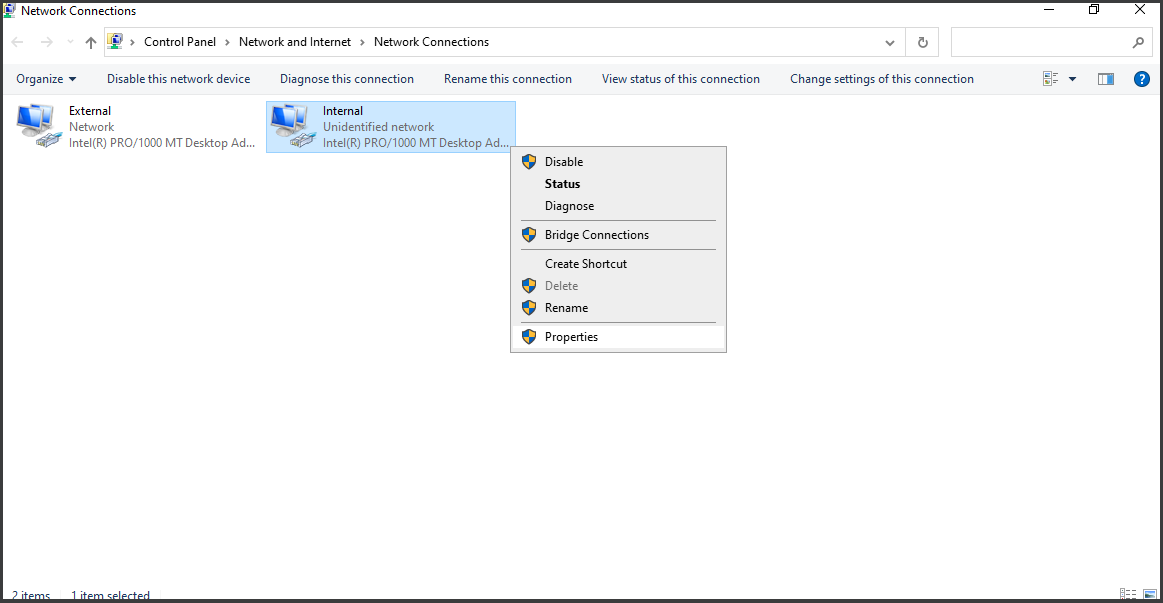
We will rename the adapters one to External and the other toInternal to distinguish between the networks.
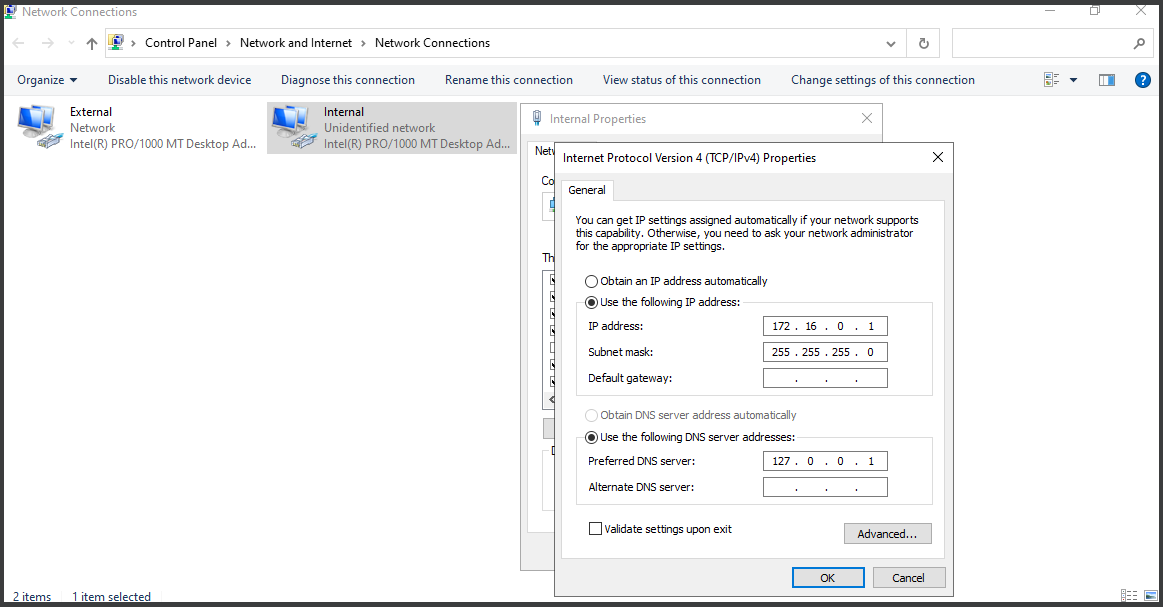
13. To configure the Internal network adapter, I have chosen the 172.16.0.0/24 range. Consequently, I have assigned the server an IP address of 172.16.0.1 and a subnet mask of "255.255.255.0".
As the server IP will eventually become the domain controller after installing Active Directory services and promoting it, the Default Gateway field remains empty. This is because the Domain Controller itself will act as the gateway.
For the DNS, we assign it the DC address, which is 172.16.0.1, or a loopback of 127.0.0.1 so it pings itself. Both ways are correct.
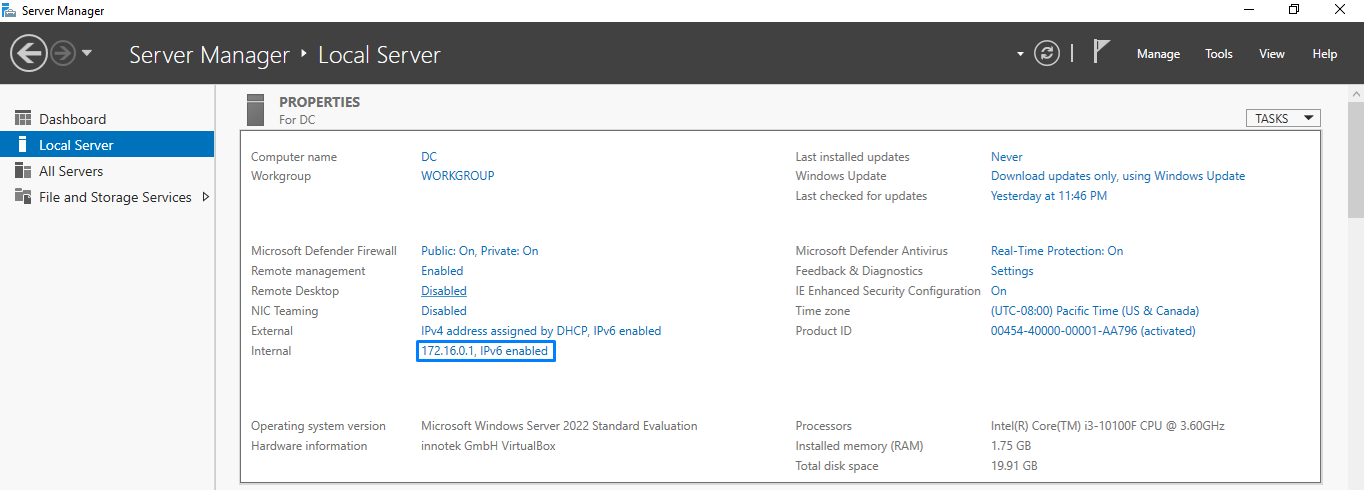
Once you have finished configuring the IP settings, navigate to the "Server Manager" and update the "Local Server" dashboard. By doing so, you will be able to view the IP address assigned to the server.
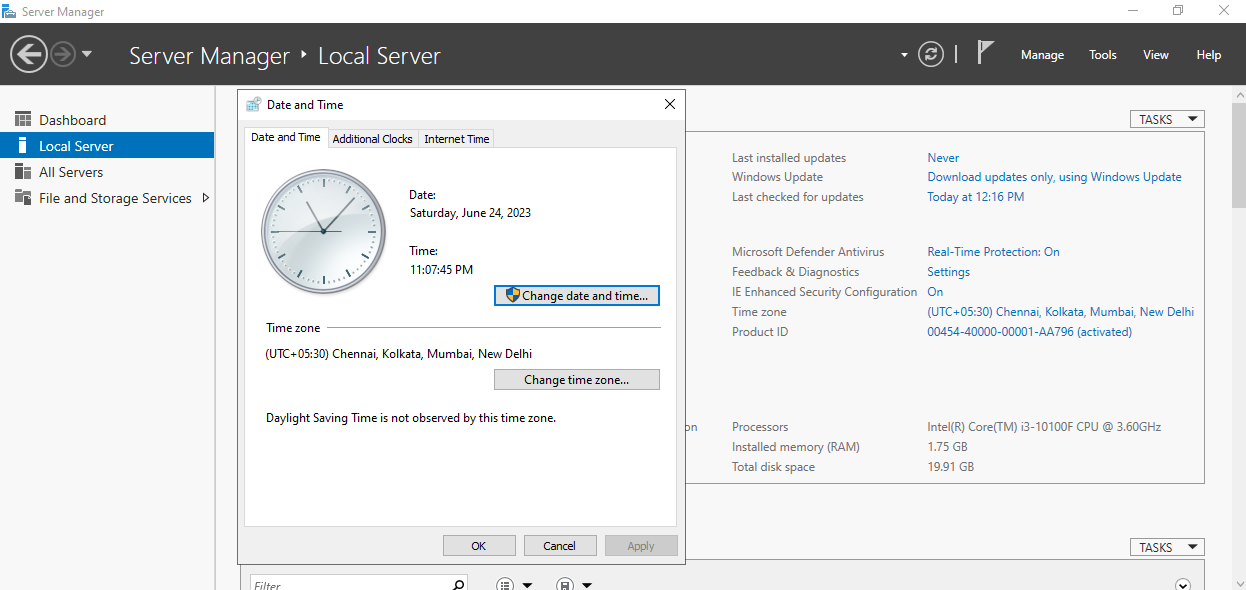
14. Changing the "Time Zone" to your location is an optional step. While the Time Zone itself is not necessary, it is important to ensure that the server's "Time and Date" are accurately set.
To promote this server to a domain controller, it is crucial to ensure that the server time is synchronized with the workstations. This synchronization is essential for the proper functioning of the Kerberos protocol, which relies on accurate time settings to issue tickets.
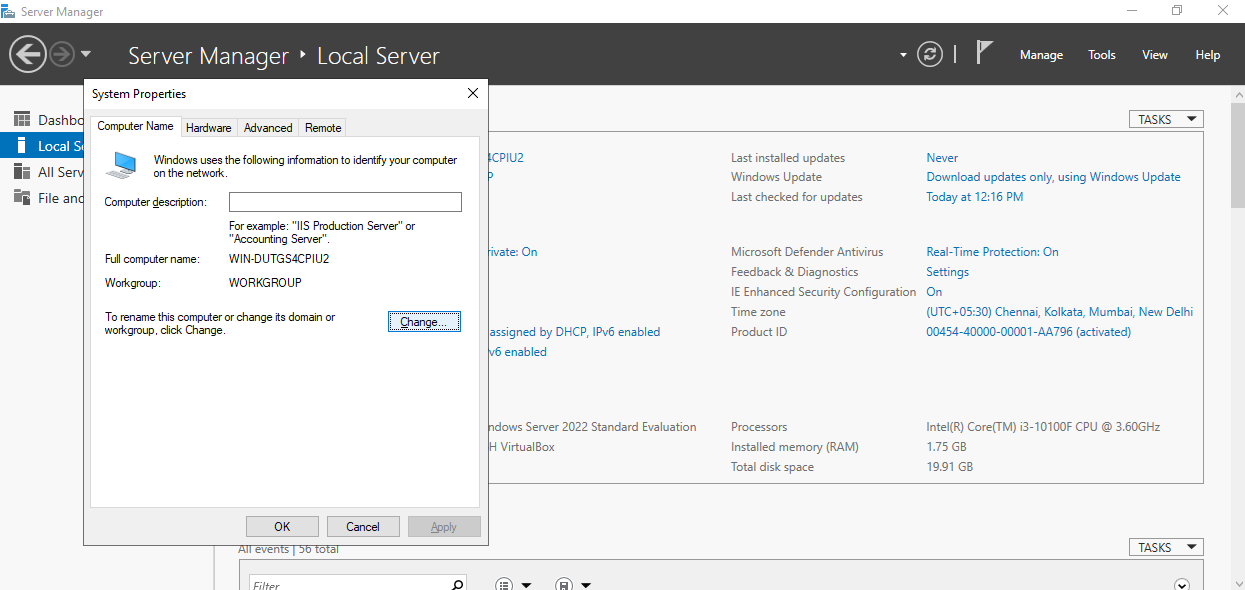
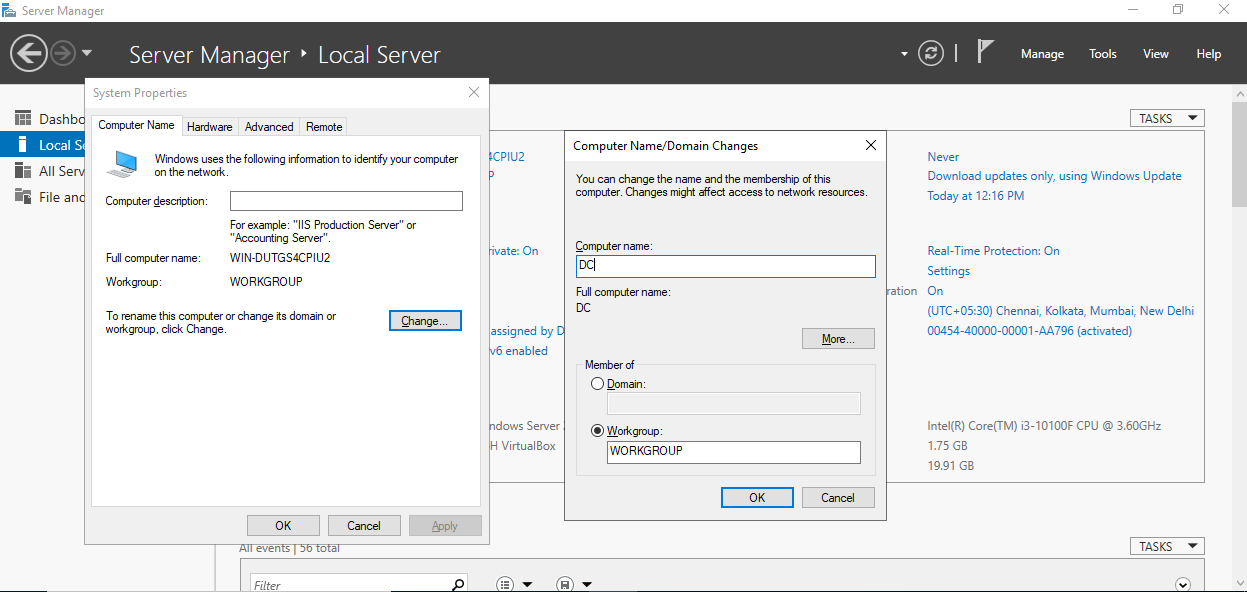
15. The last step is to rename the server to something meaningful; since it will be the domain controller in the domain. I called it "DC"
And restart the server to apply changes.
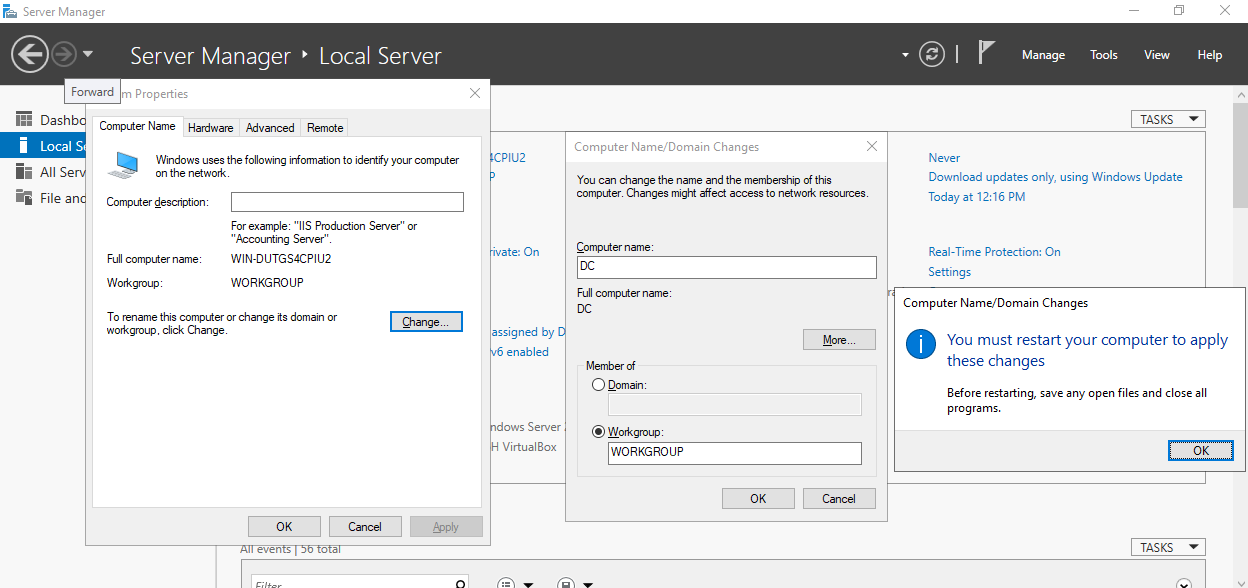
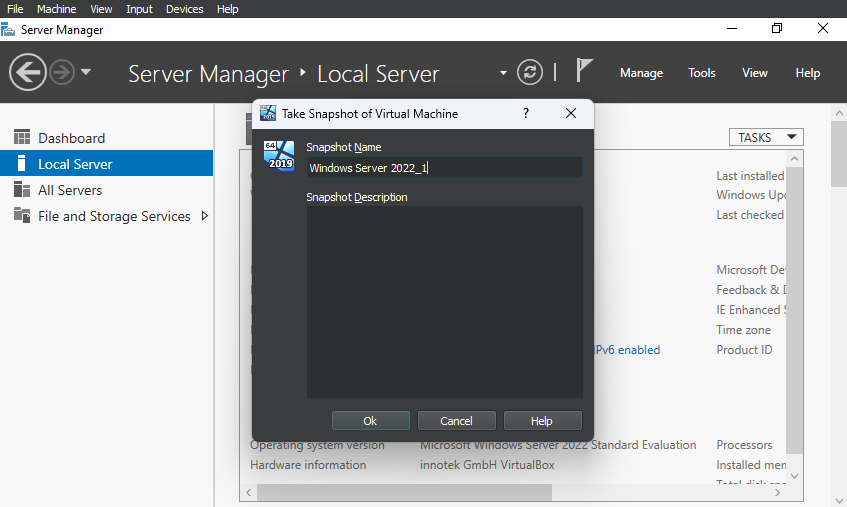
After restarting the server, log in to it and verify that the changes have been successfully implemented. Then, create a snapshot of the machine with the updated configuration.
🚨 Having a snapshot of the current VM state before installing Active Directory is crucial. In the event that you encounter any issues during the process and make a mistake, you can easily revert back to the initial state and start again from there.
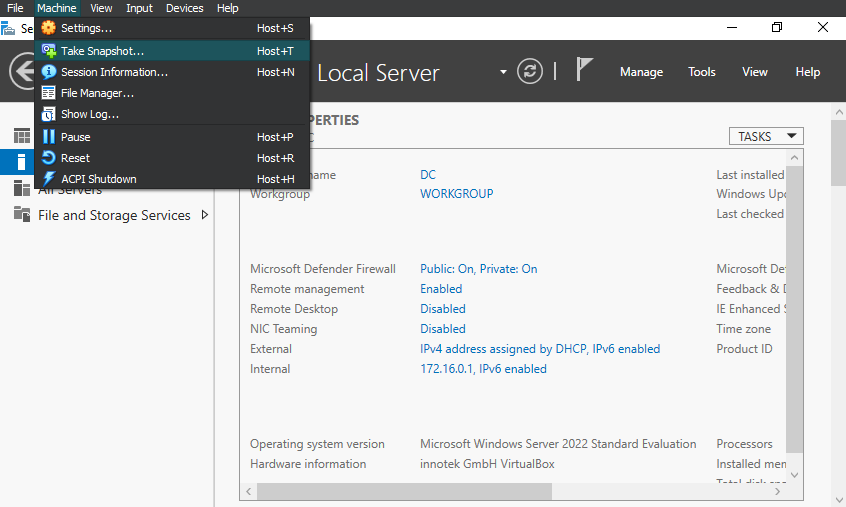
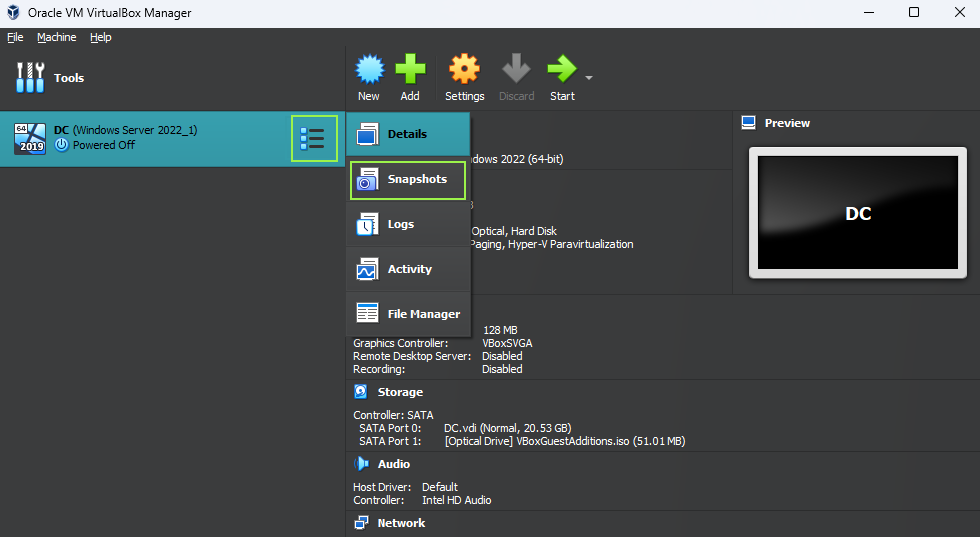
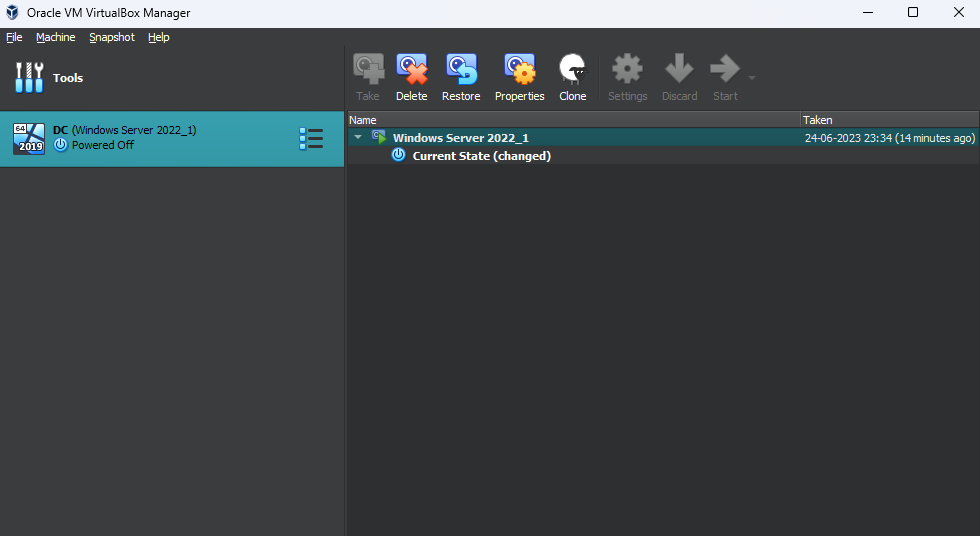
To check the snapshot, "select the VM" and click on the "three bars" next to it. Then, choose "Snapshots" from the menu.
In the next post, we will focus on the installation of Active Directory services, configuring DNS and DHCP services, and utilizing PowerShell to add users.
. . .